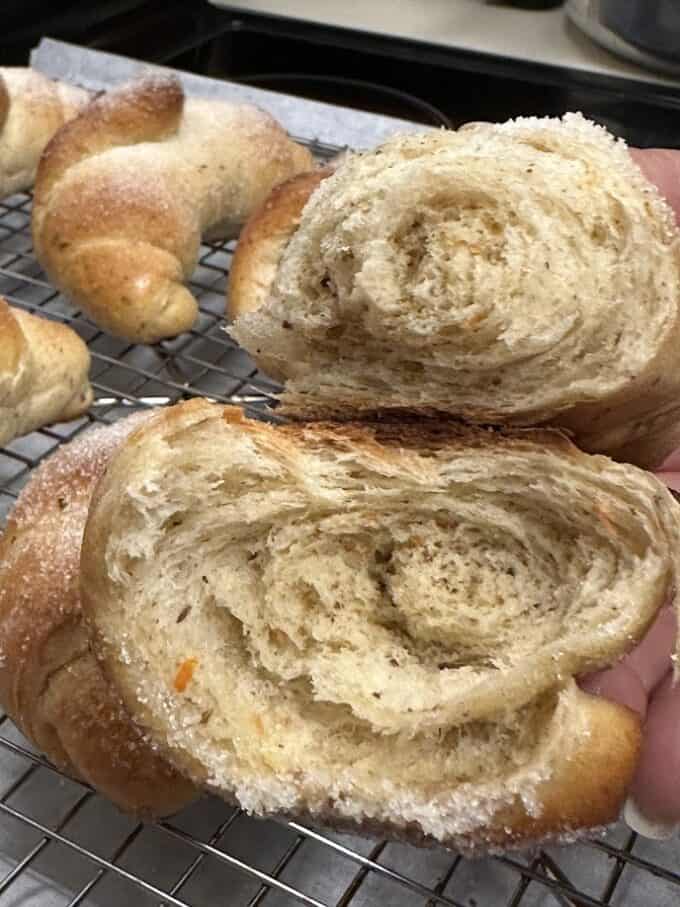
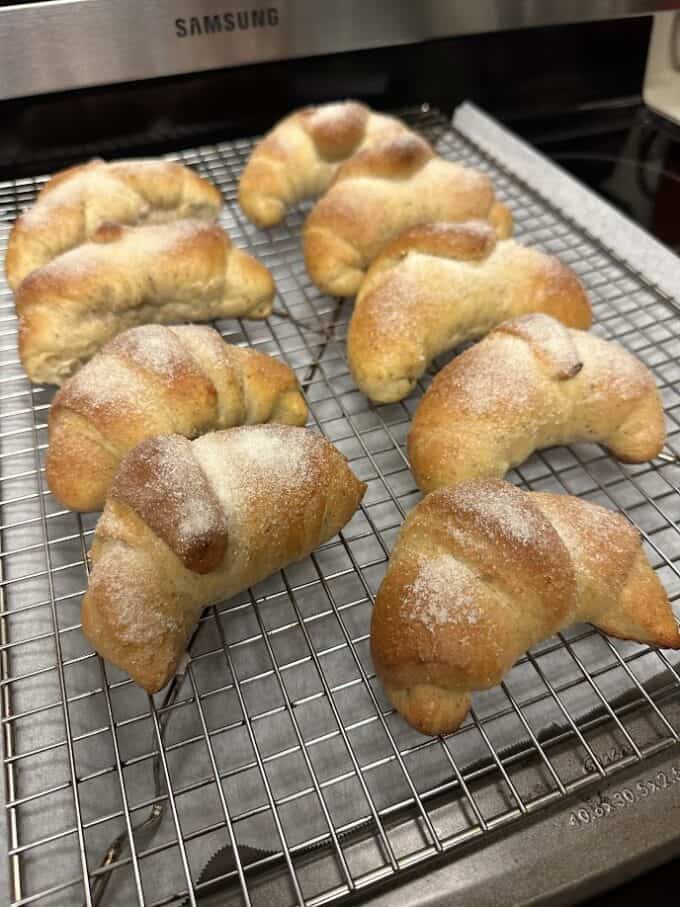
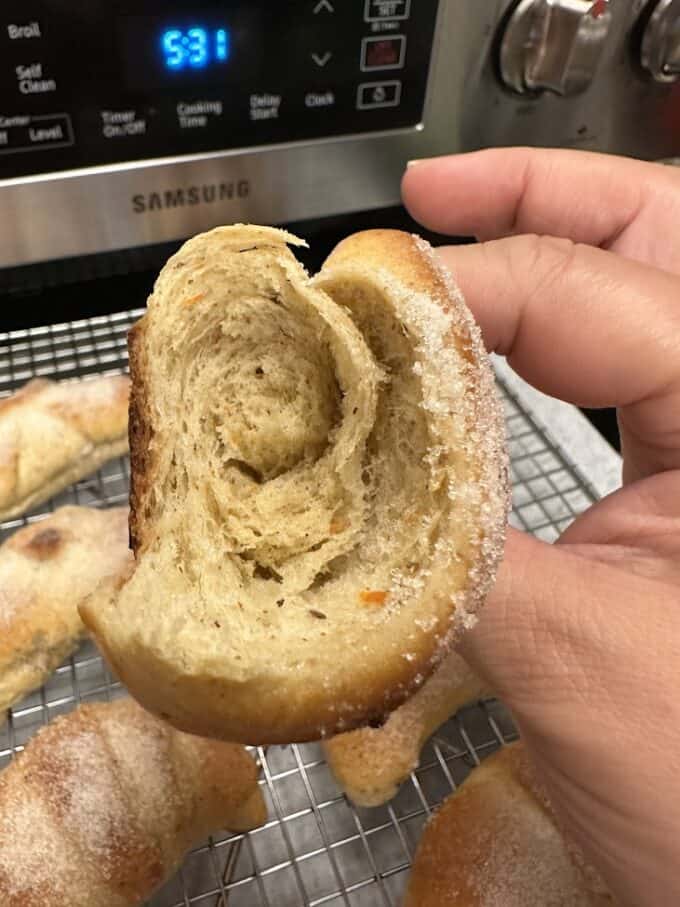
Pan dulce, Mexican sweet bread. It’s officially fall season on the calendar, but the temperatures outside are no indication of that! With the fall and winter seasons ahead, that means more baking. In all honesty, there are only so many variations I can share of a basic pan dulce dough. As I learn, yes, I am always learning more about working with yeast dough. As a food blogger, I have to prepare many seasonal recipes far in advance to be ready. For example, when I prepared this dough recipe, my intention was to prepare pan de muerto, day of the dead bread. I saved half of the dough in my freezer so that I can get back to that soon. The other half of the recipe, I decided to test the dough for creating my version of cuernitos. Cuernitos is Spanish for horns. Like horns on a bull, lol! Next time, I may try to add the sweet filling or decorate the outside with the concha topping. Stay tuned!

This Post Is Going To Be Short And Sweet! No Pun(Bun) Intended, Lol!
I wasn’t planning on creating a whole blog post on this, but I know there are some of you that need that printable recipe. I am one of those who love to see the visual, but need the recipe printed out when it comes to bread recipes and such. How do I keep the pan dulce soft after the first day? I get that question a lot. On the first day, this pan dulce is so soft and airy! That is when I enjoy the heck out of it! I let it cool completely before storing it loosely in a heavy plastic storage bag. Only problem there is that it will eventually release some moisture into the bag. If you have an extra large storage container with a lid, that may work a little better. First day is best, second day is good, third day, pop it in the microwave for a few seconds! Instantly soft! Just saying.

Don’t Judge My Technique, Lol! The Key Thing Is That With Practice You Will Improve!
I confess, I have not rolled and shaped many cuernitos in the past. Conchas, prepared them many, many times. It’s therapeutic. The stand mixer takes a lot of the work of kneading the dough by hand. Now that was a real work out when I first started preparing bread from scratch. I stuck to some basic spices like fresh ground Mexican cinnamon and anise seeds. Two flavors I am very familiar with when it comes to pan dulce. Ground cloves and grated nutmeg are delicious additions in small increments of course.

Without Further Waiting, Here Is The Newest Addition To My Little Pan Dulce Recipe Collection! Enjoy The Process and Please Send Me Your Feedback. Constructive Criticism Encouraged. Type Pan Dulce Into The Search Bar For Tons More Recipes!

Pan Dulce-Mexican Sweet Bread
Equipment
- 2 baking sheets
Ingredients
- 1 tablespoon active dry yeast
- 1 tablespoon agave nectar or honey
- 1/2 cup warm water 110-115 degrees F
- 1/2 cup sugar, plus more for dusting pan dulce
- 1/2 cup unsalted butter at room temperature, plus 1/2 cup melted and reserved for later
- 4 large eggs, plus 1 egg for brushing onto bread later(5 eggs) at room temperature lightly beaten
- orange zest from 2 oranges
- 4 1/2 cups plus of bread flour sifted
- 2 tbsps ground Mexican cinnamon
- 1 tsp anise seeds
- 1/2 teaspoon salt
Instructions
- In a large measuring cup, combine the yeast, agave and warm water. Stir gently until mostly combined and let sit for 10 minutes.
- In a bowl of the mixer, cream together the sugar and butter until smooth. Mix in the eggs and orange zest. Then mix in the yeast/water mixture just until combined.
- Combine the flour, cinnamon, anise and salt. Gradually mix in the dry ingredients to the wet until dough begins to form. On medium /low speed, using the hook attachment, knead the dough for up to 20 minutes. Let the mixer rest for a few minutes after 10 minutes. The dough will be ready when it pulls away from the sides of the bowl on it's own. Gently stretch the dough with your fingers. If it does not tear right away, then it's ready. If not, continue kneading for a few more minutes.
- To the dough. drizzle in some oil and using your hands, shape into a large ball, making sure the exterior has a light coat of oil all around. Cover bowl with a kitchen towel and let rise in a warm spot for 1 hour or until it grows twice as big.
- If ready after one hour, transfer dough to flat surface and knead gently for a few seconds. Using a pastry cutter or knife, divide the dough into 18 equal dough balls. keep them lightly covered as you work quickly.
- To create the shape of the cuernito in the video: Remember, I was just testing the shape this time, lol! On a lightly floured surface, place the dough ball and flatten slightly. Applying pressure in the center, extend the dough up, then down, applying enough pressure to roll out a long and skinny looking stretch of dough. Once it's rolled out, you could add a thin layer of concha topping to fill the cuernitos. I did not have any this day. Starting at the end closest to you, begin to roll as tight as you can. As you gently roll up, you will stretch out both sides as to extend and make the cuernito longer. Ideally, you want the seam side down.
- Transfer cuernito to lined baking sheet and curve in the ends towards each other to shape it. Continue working as quick as you can to finish the rest. Once done, cover again with a light kitchen towel and let proof for 45-60 minutes.
- When just about ready to bake, preheat oven to 375 degree F. Whisk the reserved egg with a splash of cold water. Brush the cuernitos with egg wash. Bake in preheated oven for 24-28 minutes or until light golden brown. For more browning, place cuernitos 12 inches under the broiler for less than a minute.
- While cuernitos are still warm, brush them with melted butter and sprinkle the tops with sugar.
Is it ok to skip the eggs? Thanks
I honestly have not prepared this type of pan dulce without eggs. That is why it’s called pan de huevo. I believe my friend Dora at Dora’s Table website has a vegan recipe for conchas.