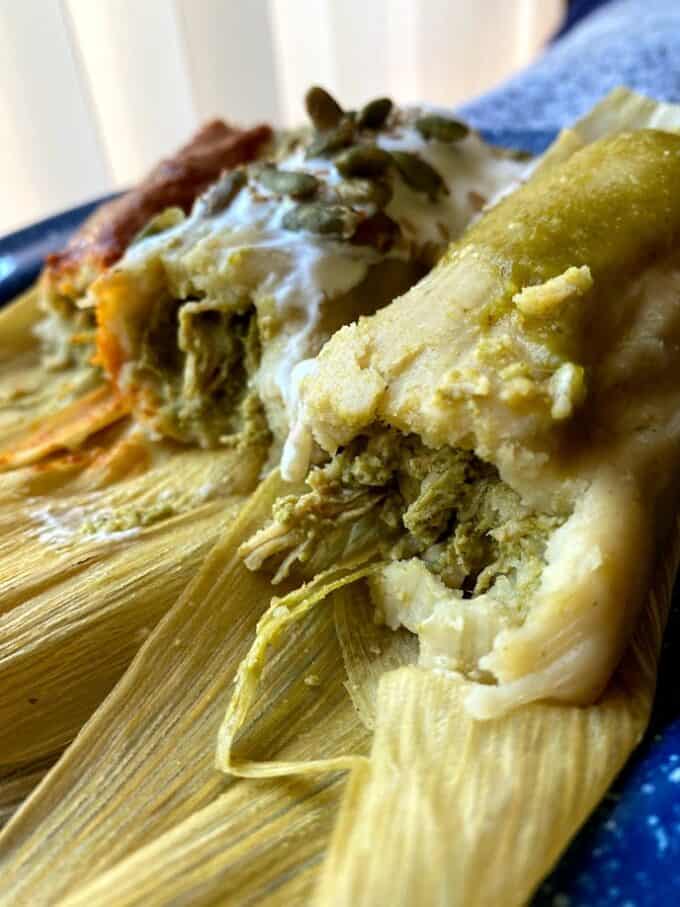
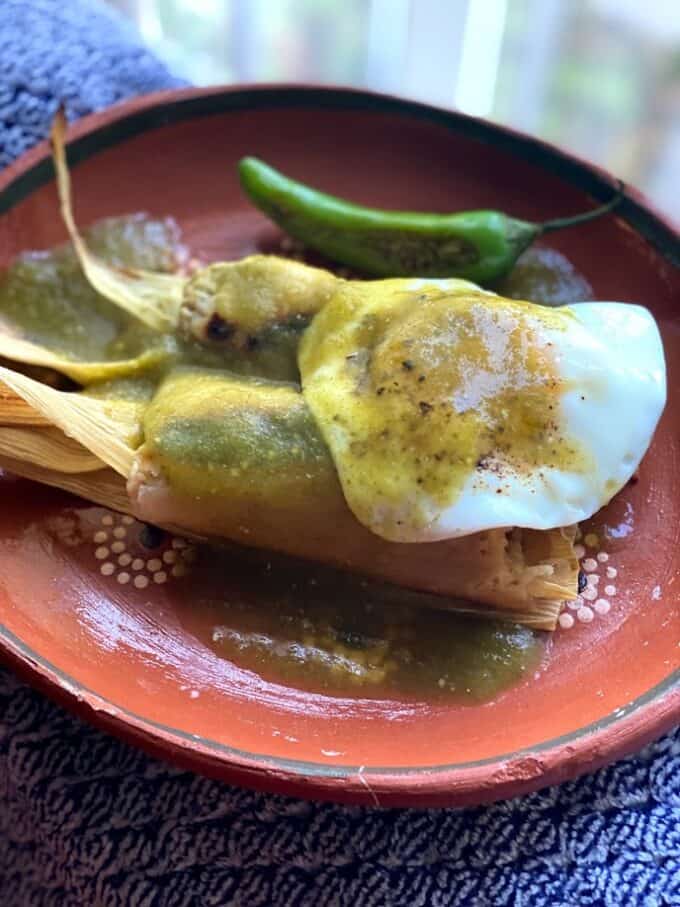
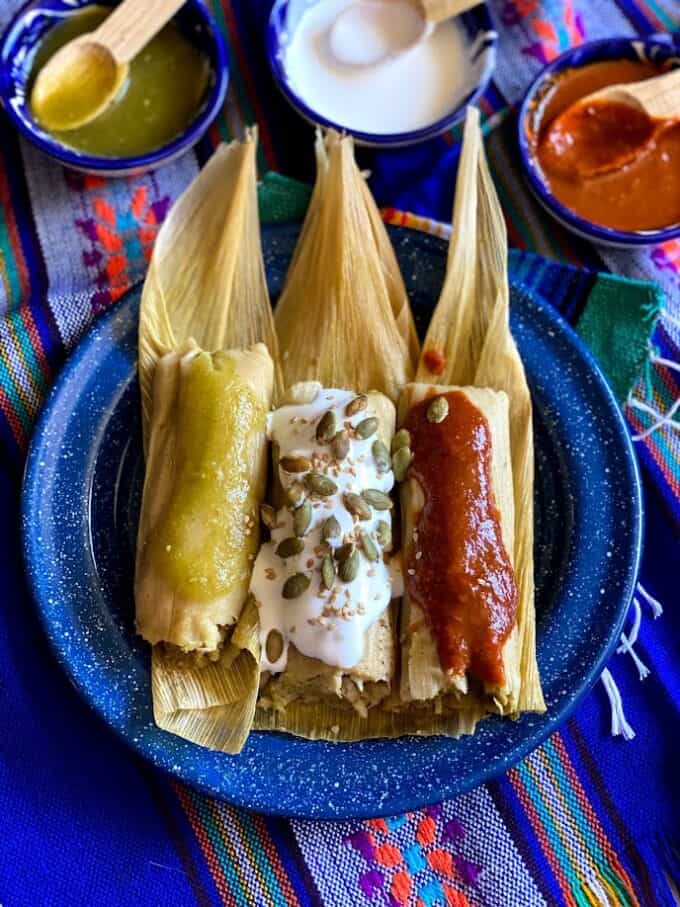
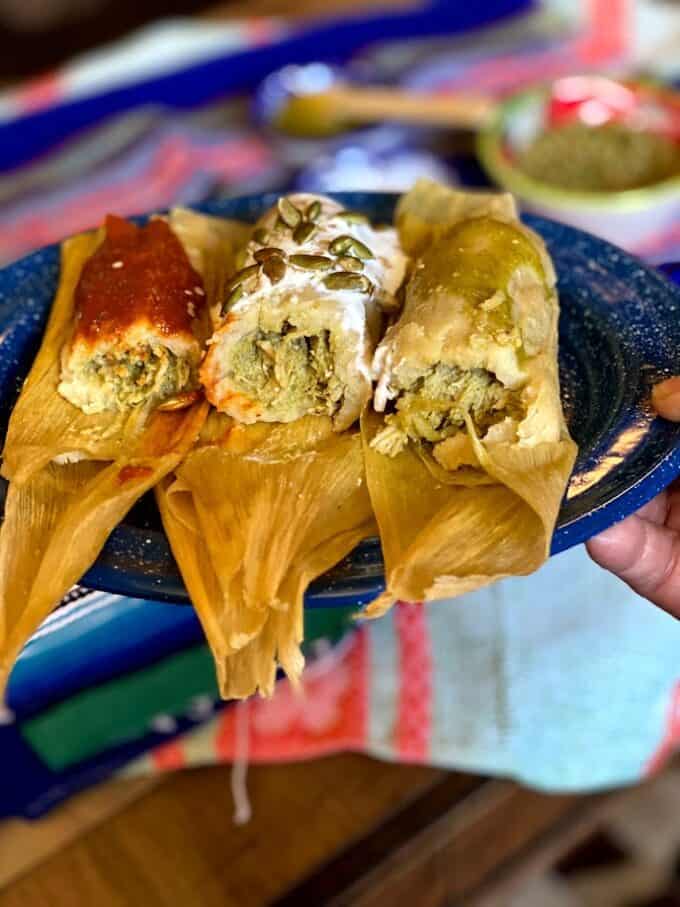
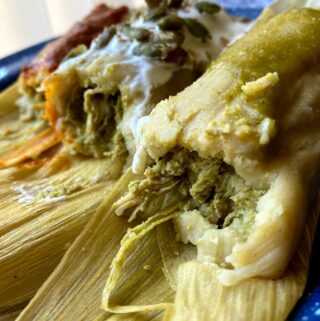
Mole verde may not be as popular as mole poblano, but it’s especially delicious in these chicken tamales!
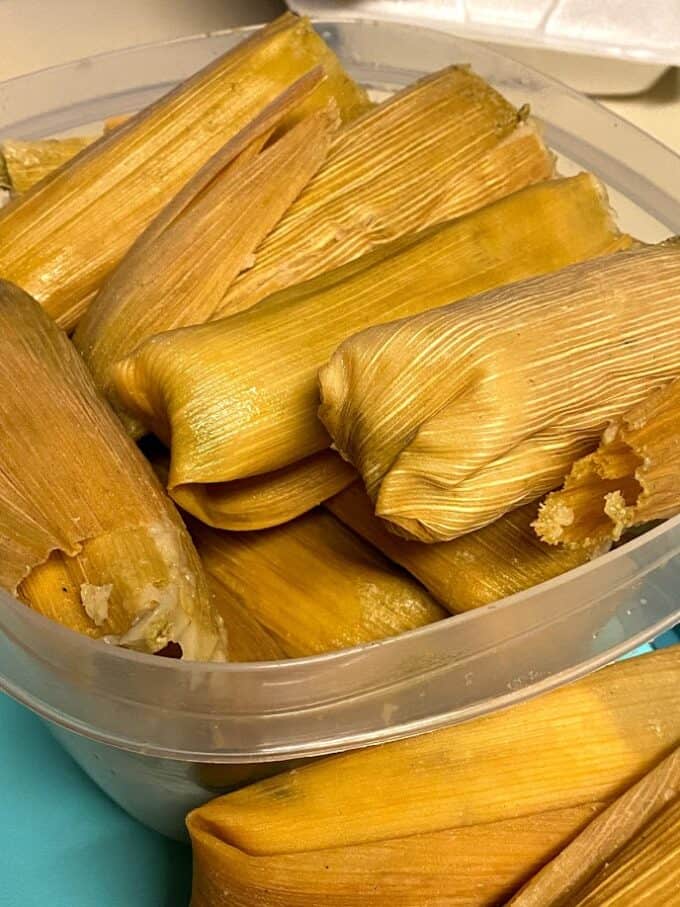
Play by play tamal making!
Almost every single time I prepare tamales, I try to share the play by play on my Instagram stories. I have to remind myself that there are new followers daily and even though I repeat a lot of what I do, there may be a new follower. My goal is to try and inspire followers to attempt the recipes in their own kitchens. Yes, they can be intimidating, but they are doable. This was my first time preparing a mole verde chicken tamal. Delicious! Definitely would prepare them again.
Tamal making summertime!
As a food blogger, the summertime is when I am developing new recipes for the fall and holiday season. It’s the best time to test out new tamal recipes, why not? There’s no pressure and I could take as long as I want. You are going to laugh at me when I tell you that I developed this recipe at the end of last summer and I am just posting it now!! Oh boy! Lol! My life was interrupted with major surgery and my first cookbook! For some, they can only enjoy tamales during the holidays. Why?? If I get the craving, you are going to see me whipping out my steamer pot. Most times, I am only preparing about two dozen tamales. I share with friends and they’re gone.
You think you know everything? Not possible!
I once heard a quote that really struck me. The quote is, “If you think you know everything, then there is no more room for you to grow.” So true! How can one possibly know everything when it comes to recipes? Even recipes that we may prepare over and over again can be adapted in various ways. What works best for me may not necessarily work for another person. Spreading the masa with a spoon works great for me and that’s how I learned from my parents. Others prefer to use a butter knife or plastic masa spreader. My goal this season is to teach myself to use the plastic masa spreader. There is a little more counter space in my kitchen now. The moral of the story is that we should always be open to learning something new.
Stand mixer or by hand?
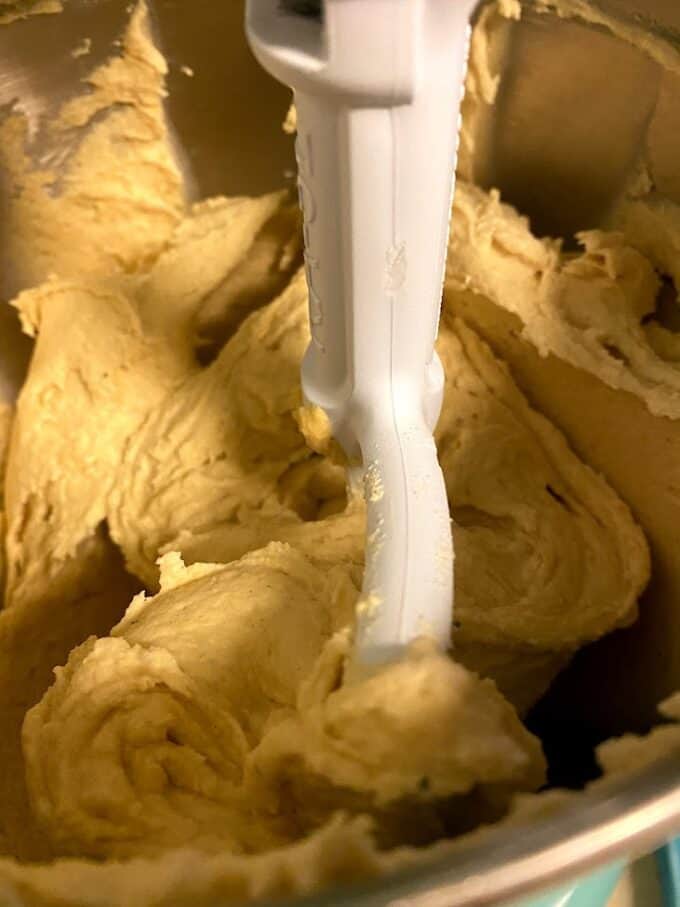
I grew up watching my parents mix 20 pounds of masa by hand. Those were just tamales for the family during the holidays! Lol! When my parents had their small restaurant, my dad would use a commercial size stand mixer to mix up to fifty pounds of masa! Before I purchased my stand mixer, I mixed the masa by hand. Five to six pounds of masa is what I would prepare most times. It was challenging at times because I have problems with both my wrist. You can imagine my relief when the stand mixer came into my life. I fell in love! Never had family near to help during tamal season, so I am used to doing it alone. Break it down into several days and it works great!
Natural rendered pork lard is going to give you masa more flavor! Some are not fans of the flavor and prefer to use the lard that comes in a block, it’s white. I remember that lard very well. It’s inexpensive and what my parents used when preparing large quantities of masa.
The stand mixer made my life easier! Look at it as an investment. Tools that will last as long as they are used properly.
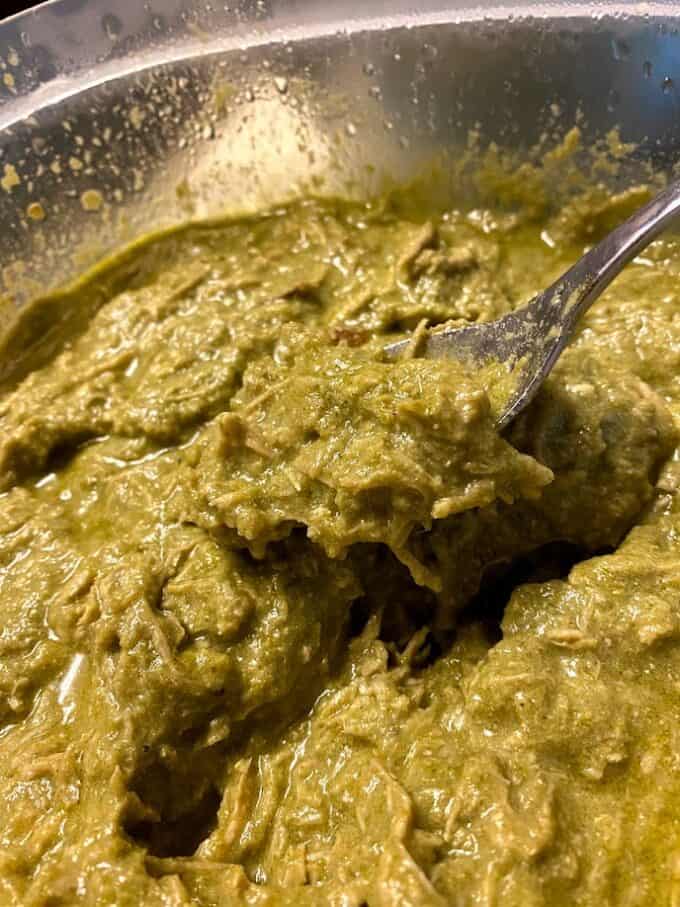
Mole doesn’t always have to be so complicated!
Mole verde with shredded chicken or pieces of chicken slowly simmered is quite delicious! I don’t understand why more people are not fans of mole verde. Are you into the more traditional looking mole poblano? My goal this tamal season is a hearty mole poblano recipe to share with you all. Stay tuned!

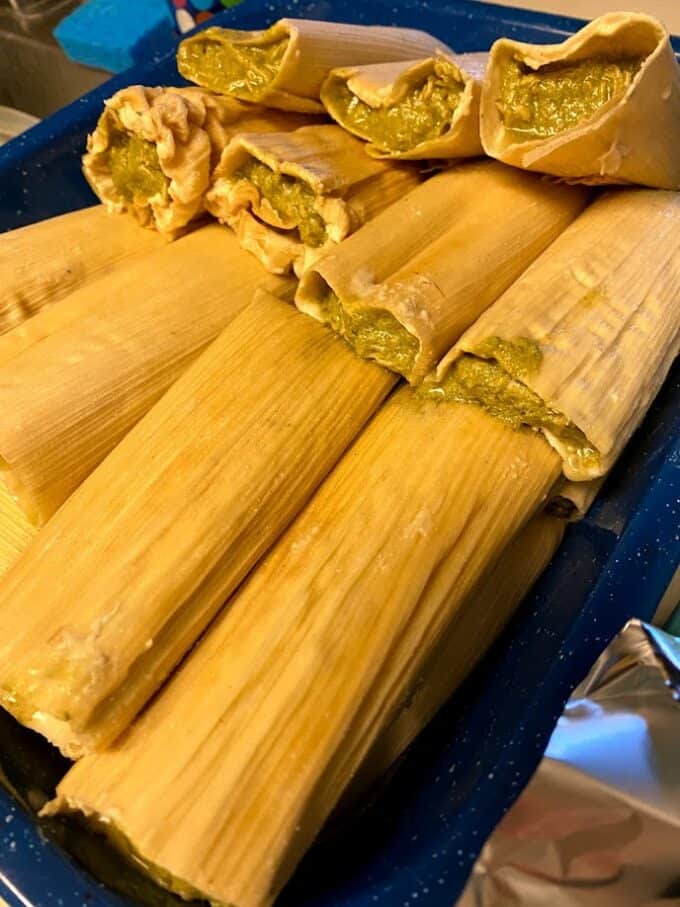
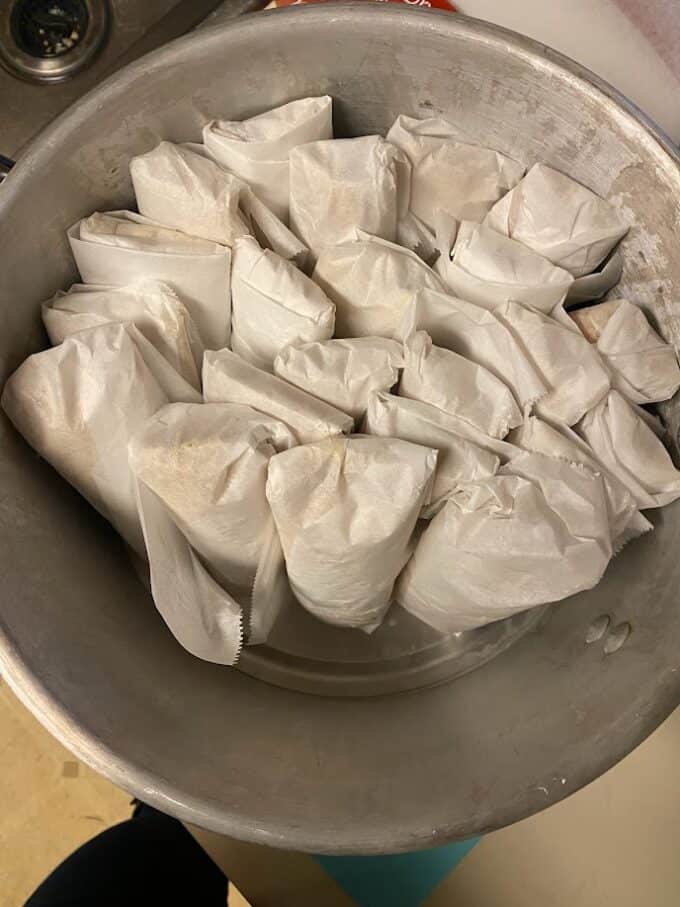
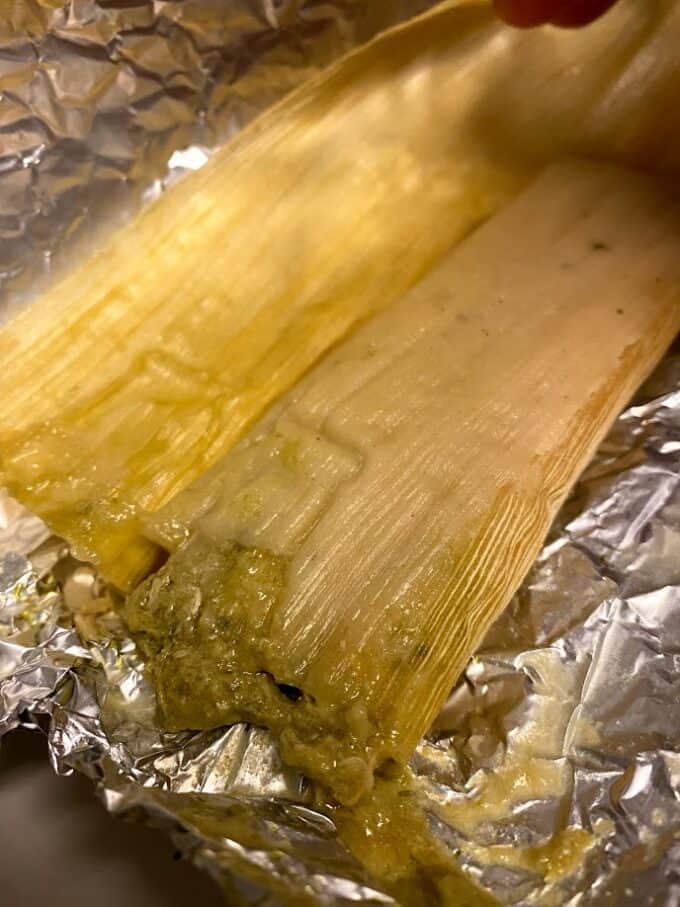
Deli sheets or no deli sheets?
It’s not what I grew up with for sure. The tamales will still be delicious without the use of deli sheets! Look at them as a tool that is optional. Personally, I do enjoy the results when I use the sheets. For example the mole verde had a lot of sauce. Wrapping them with the paper, kept the sauce from going all over the inside of the steamer pot and gave the tamales a nice shape.


Mole Verde Chicken Tamal
Equipment
- Large Steamer Pot
- deli sheets to wrap tamal optional
Ingredients
- 40-50 corn husk
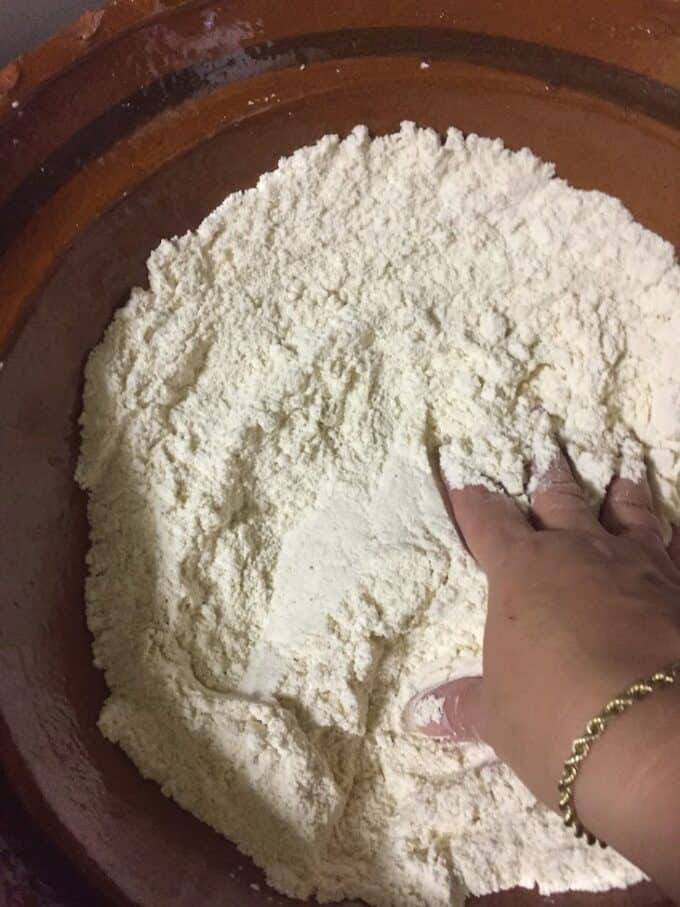
- 4 cups corn flour masa harina(maseca for tamales)
- 2 tsps baking powder
- Salt to taste
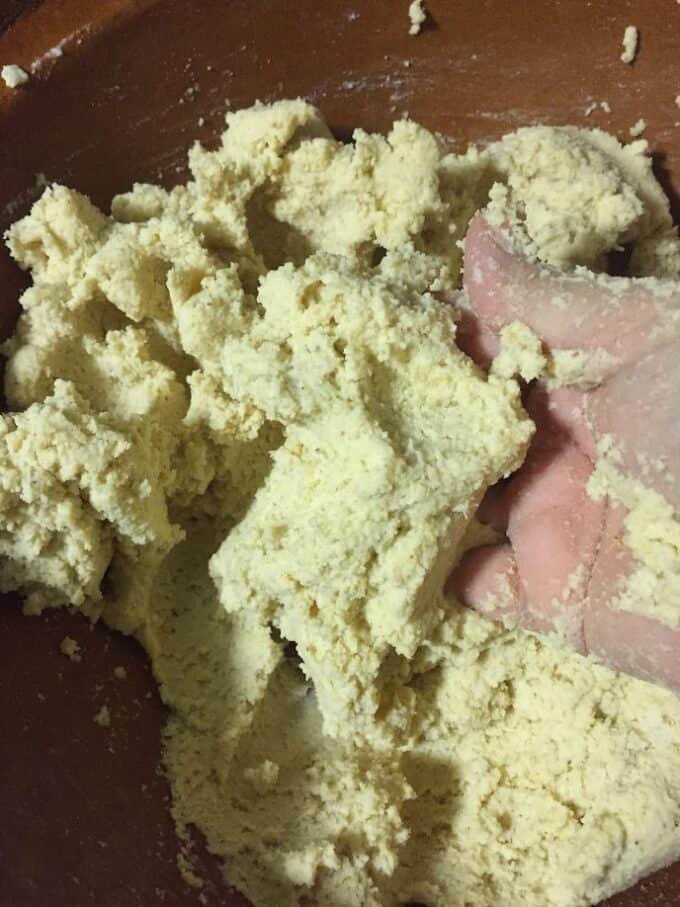
- 4 cups chicken broth at room temperature
- 1 1/2 cups natural rendered pork Manteca, if possible melted, then let cool
- Mole Verde with Shredded Chicken, see link
- Red and Green Salsa of your choice
- Mexican crema
- toasted sesame seeds and pepitas optional
Instructions
Corn Husk
- In a deep pot, add the corn husk. Pour in very hot water. Enough to cover them completely. If needed, you can weigh them down with a heavy bowl. Let them soak for at least one hour or more.
Masa
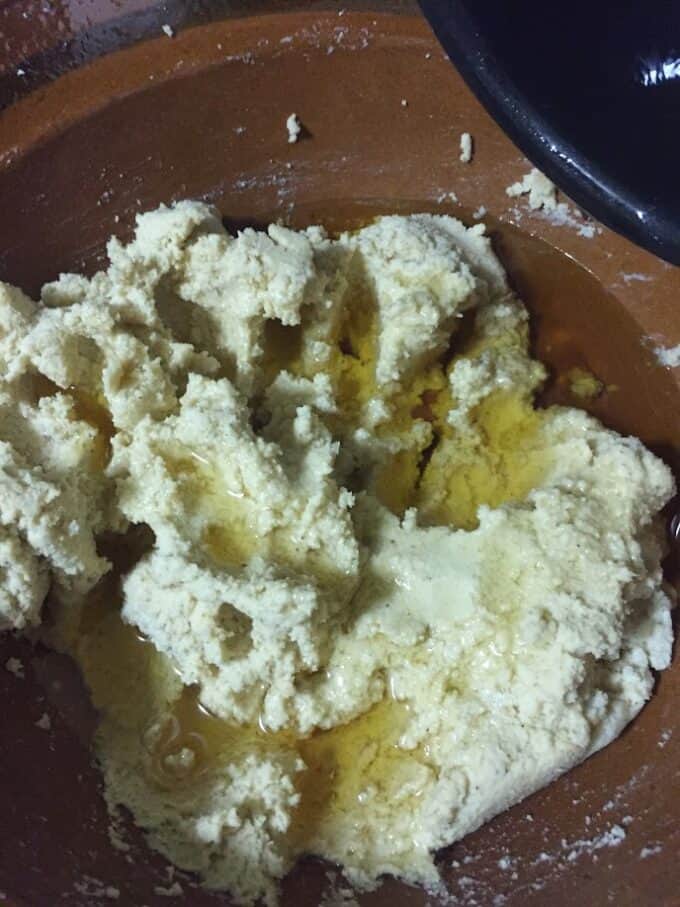
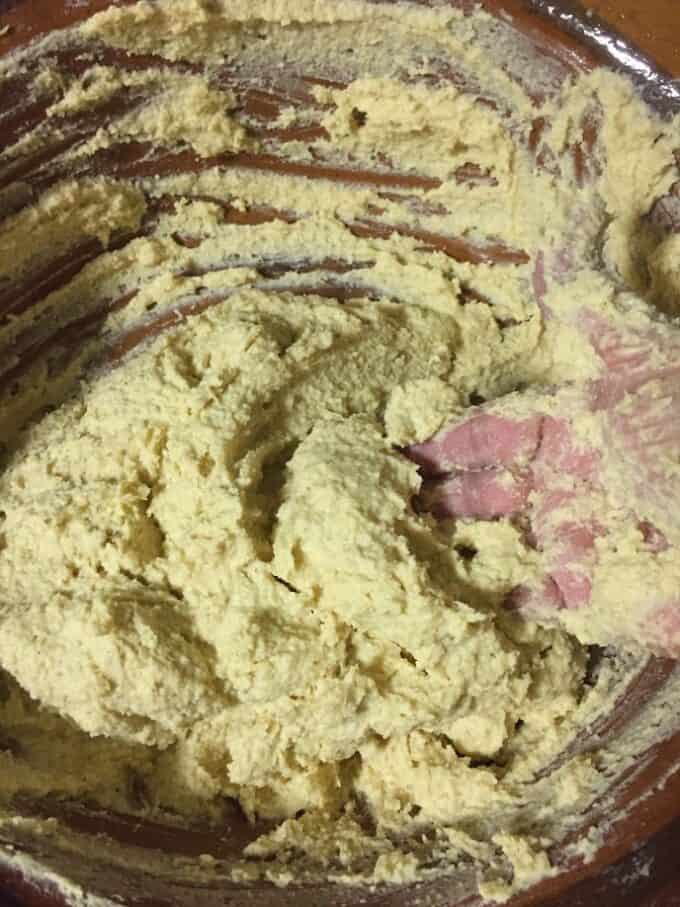
- If using a stand mixer, add the dry ingredients to the bowl. Whisk to combine the masa harina with salt and baking powder. With the mixer on low, gradually mix in the cool chicken broth until masa forms. On low again, gradually mix in the cooled pork lard. Start by mixing in 1 cup first. As it comes together, turn speed up on the mixer and mix for 5-6 minutes. I confess that I always end up mixing in more lard, At least another 1/4 cup.
- Very important that you taste for salt at this point. Nothing worse than bland masa. If you want to do the float test, drop a tiny ball of masa into a cup of cold water. If it floats, it's ready. Cover masa tightly and chill for at least 6 hours. Letting the masa rest will yield a more flavorful masa. If mixing by hand, this will take a little longer.
Assemble and Cook Tamales
- When you are ready to assemble your tamales, prep your work station. Take the masa out of the refrigerator out and give it a good stir! Fill a medium bowl with some of the chilled meat filling. You don't want to have the large bowl of meat sitting out the whole time, so just take out little at a time. Pull some of the corn husks from the soaking water and shake off the excess water. Have a tray or baking sheet ready to place your filled tamales.
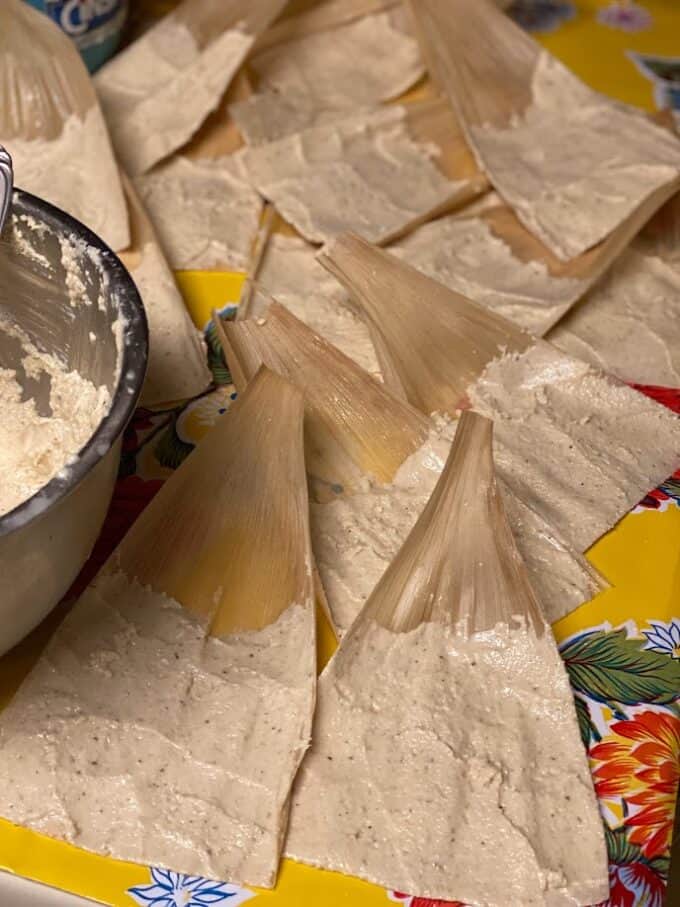
- Take one corn husk and tear off one side until you have a husk that is about 4 1/2 inches wide in the middle. it should fit comfortably in the palm of your hand. Using a spoon, scoop about 3 tablespoons of masa onto the center of the corn husk. Apply some pressure as you press and spread the masa towards the sides of the husk. If it's easier for you to use a plastic masa spreader, than use that. I am comfortable with a spoon, lol! Lay the husk with masa slightly layered on the baking sheet or on the counter.
- When ready, fill each tamal with roughly 3-4 tablespoons of meat filling. Don't be skimpy! Fold in the sides of the tamal so they overlap. if they don't overlap, you added too much filling. If you are using the deli sheets, place the tamal in the center and you can try to wrap it tightly like a small burrito. Just make sure you know which is the open end.
- Once tamales are ready to be steamed, prepare the steamer pot. Fill to the line indicated in the pot. Some like to add a few pennies to the bottom. Coins will rattle when water begins to boil. If the coins don't rattle, that means you ran out of water and you don't want that. Add the steamer insert. Place a few extra softened corn husk on top of steamer insert.
- Place the filled and wrapped tamales, open end up into steamer pot. Don't over fill the pot. You want them to fit comfortably. A trick I use sometimes to get my tamales to stand up straight is to place some extra corn husk around the inside of the pot. Sometimes I use foil paper. It's up to you.
- Once pot is filled with tamales, add some corn husk to cover the tamales, then cover pot with the lid. Start with high heat until they begin to steam rapidly. Reduce the heat to right below medium, as long as it's steaming at a steady pace. Fill a medium pot with water and heat on low. Set your timer to 45 minutes. After 45 minutes, I carefully pour in more hot water to my steamer pot. Cover once again and continue steaming for another 45 minutes. When ready, carefully pull out one tamal and transfer to a plate. let it cool for 6-7 minutes before you open it. If the husk pulls away easily, the tamales are ready.
Hello could you use crisco vegetable oil in place of lard?
Hi Joseph! I would just use regular canola or vegetable oil if you don’t want to use lard. It will be delicious!