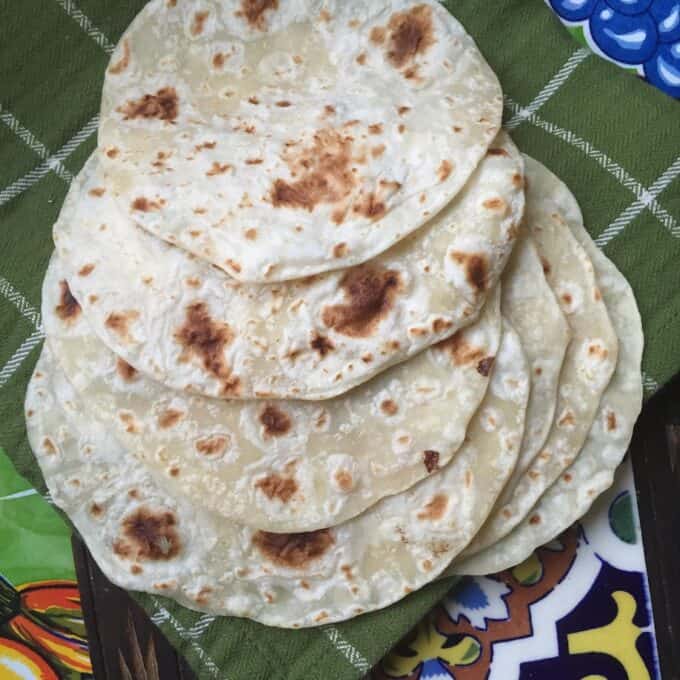
The original flour tortilla recipe my mom shared with me consisted of a whole 5 pound bag of flour, no exact measurements for hot melted shortening or lard and directions to just keep adding water until a smooth dough formed. I wrote the recipe down in my first recipe book, put it up on the bookshelf and walked away, lol! To say it was a bit intimidating is an understatement.
Just Wing It Already!
After a year of being married, I decided to tackle the recipe on my own for the first time. In 1987, you could not google a recipe. I decided I was going to wing it! It was time to use what math skills I could remember from high school and broke down the recipe. Started with 2 cups of melted shortening, added some salt, cold water and just gradually started adding flour and mixing with my hands. Thought I was happy with the dough until I tried to roll it out..oh my! There were tortillas in the shapes of every state in America! Dry and cracked, nothing like my Mom’s flour tortillas that I would dream about.
Try and Try Again!
It took me quite a few years to finally feel comfortable with the recipe. I am no expert, by any means, but I am a lot better than 30 years ago! The key is to not give up. No good thing comes easily!
With A Little Help, I Improved!
Every time I prepared them I learned something new or adjusted the measurements. Little by little they were more like what I remembered. Often, I returned home to L.A., but my Mom was too ill to make tortillas and that made me even more determined to get it right. During a visit from my brother Ismael and his family a during the summers, his mother in law ,Tommie, helped me fine tune the rolling of the tortillas. I think after 35 years I am finally happy with my tortillas and would be proud to serve them to my parents.
Every tortilla recipe I share, the measurements will vary slightly depending on what ingredients or flour I may be using on any given day. This is why it’s good to test several recipes and stick with the one that works for you!
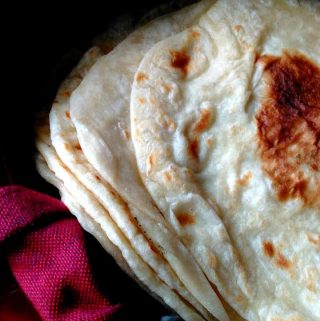
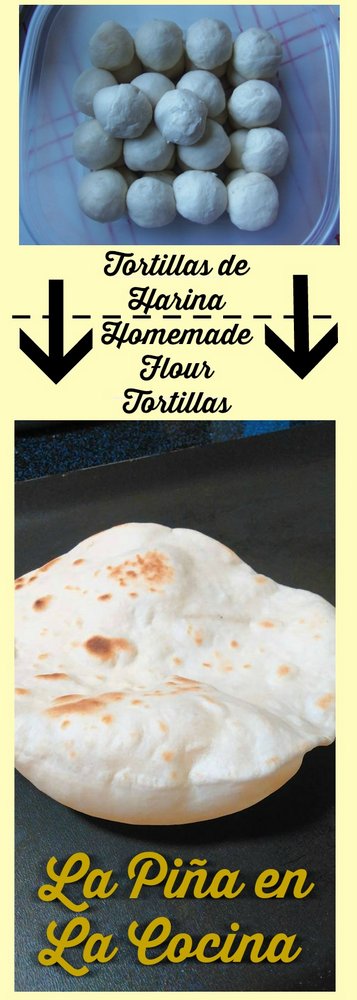
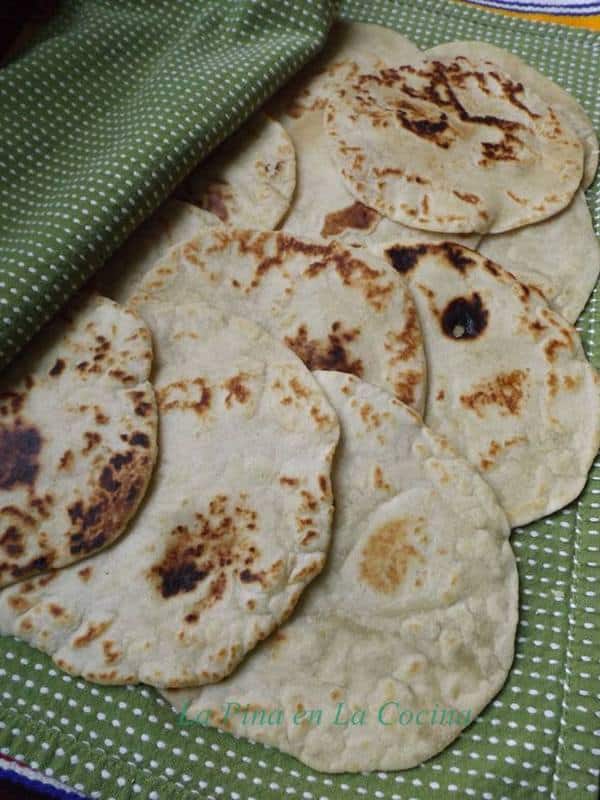
Homemade Flour Tortillas
Ingredients
Ingredients:
- 3 cups of all-purpose flour more or less
- 3-4 tbsps. pork lard or vegetable shortening
- 1 teaspoon salt
- 1 teaspoon baking powder THE BAKING POWDER IS OPTIONAL.
- 1 cup hot water
- Extra flour for dusting
Instructions
Directions For Rolling and Cooking Tortillas
- Melt the shortening in a microwave-safe bowl (glass). Add the water, salt and baking powder. Using a rubber spatula, at first, gradually add 1 cup of flour. Gradually add in just enough flour for the dough to come together and be slightly sticky. Transfer dough to work surface and knead for 7-9 minutes. Avoid adding more flour as you knead. It should be soft, but no longer sticky. Cover with a light kitchen towel directly onto the masa and let stand for 15 minutes.
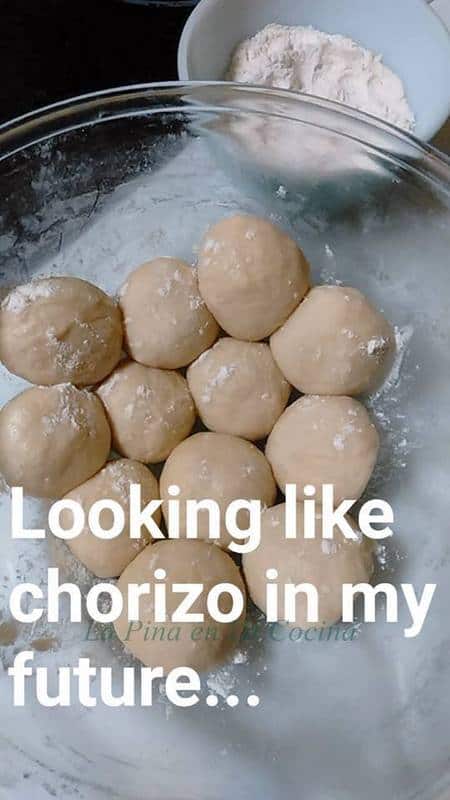
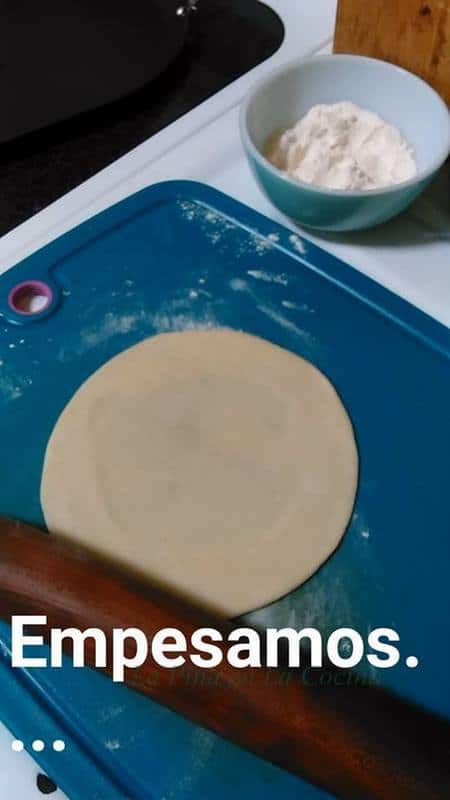
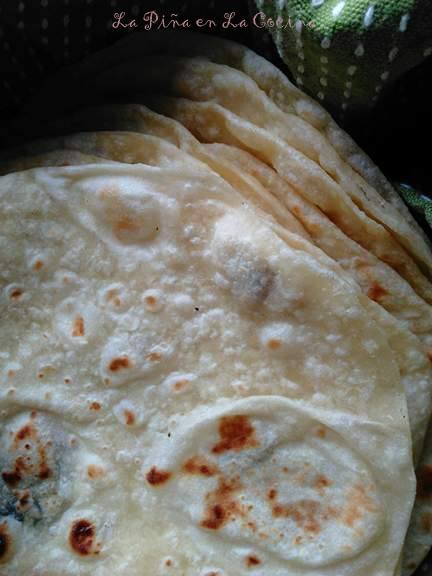
- After 15 minutes, Roll and shape 20 dough balls, about 2 inches. Place back into bowl and cover once again for 10-15 minutes. Preheat comal or griddle pan to just below medium heat for 5 minutes. On a flat surface, dust lightly with flour and roll out one dough ball at a time (about 5-6 inches). Cook on comal/griddle. Tortillas should sizzle and start to form bubbles right away. It literally is about10 seconds per side, flipping twice. You should have golden brown spots. Some spots will be darker and that’s ok.
- If tortillas are cooking too fast, turn down the heat. You want a light to medium brown color. Stack the cooked tortillas in between a clean kitchen towel or in an insulated tortilla warmer, and keep them covered. Once the tortillas are completely cool, store in resealable plastic bags, in the refrigerator. Reheat on hot griddle for a few minutes. They will keep for 7 to 10 days.
Notes
1/2 cup vegetable shortening, melted
1 tsp. salt
1 tsp. baking powder
1 cup hot water
extra flour for dusting 1. Melt the shortening in a microwave safe bowl(glass). Add the water, salt and baking powder. Gradually mix in just enough flour to yield a tacky dough. Knead the dough for 5-7 minutes. Cover with plastic wrap and let stand for 30 minutes. 2. After 30 minutes, preheat a griddle to medium heat. Make dough balls, about 2 inches. On a flat surface, dust with flour and roll out one dough ball at a time(about 5inches). Cook on griddle until the tortilla starts to bubble up, turn and cook for another minute. 3. If tortillas are cooking too fast, turn down the heat. You want a light brown color. Stack the cooked tortillas in between a clean kitchen towel, keep them covered. Once tortillas are completely cool, store in ziploc bags, in the refrigerator. Reheat on hot griddle for a few minutes. They will keep for 7 to 10 days.
Tips~ I get asked a lot on the temperature of the water when preparing the tortillas. I have used both hot and cold water while preparing recipe, both have worked. But I prefer a warm to hot water.
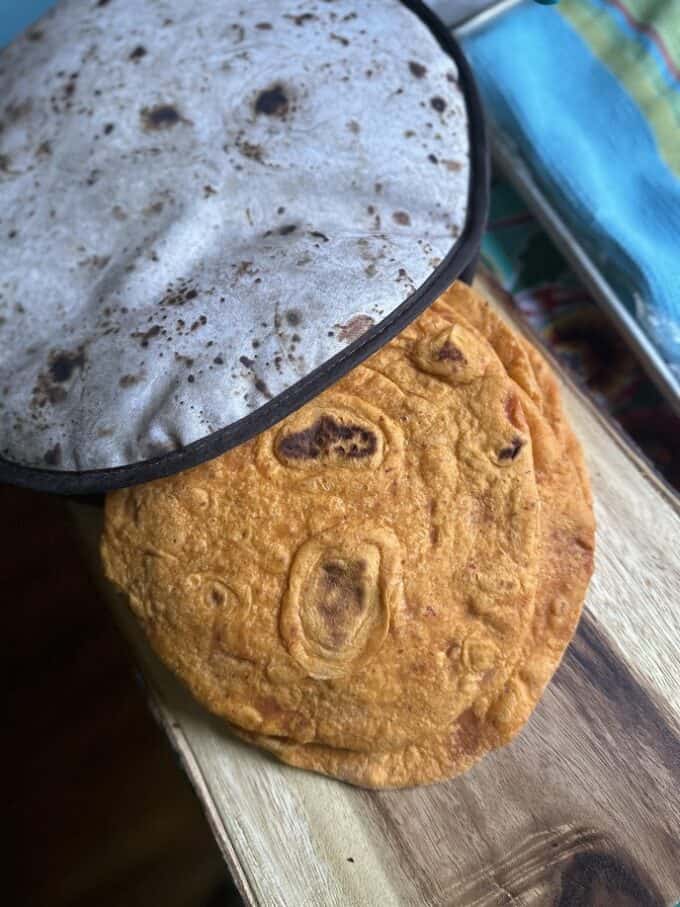
Chile Guajillo Flour Tortillas
Equipment
- Griddle or Comal, Cast iron or non stick
- Blender
- Tortilla Warmer
Ingredients
- 3 large, dried chile guajillo( 30 grams) stems and seeds removed
- 1 1/2 cups room temperature water
- 1/4 cup vegetable shortening or pork lard, plus 2 more tbsps separate
- 4 c all purpose flour, plus 1/2 cup reserved separate
- 1 1/3 tsps baking powder
- 1 1/3 tsps salt
Instructions
- While you gather and measure your ingredients, heat 2 cups of water at medium in a med. sauce pan. After removing the stems and seeds from guajillo peppers, transfer them to the pot of warming water. Cook for 8 minutes. Let sir for 5 minutes.
- In a large bowl add the shortening(or lard). Using a spoon or your hand, cream the shortening for 2 minutes. To the bowl, add the flour, baking powder and salt. Whisk gently to combine the dry ingredients.
- Drain the water from the soaking chiles, then transfer them to the blender jar. Pour in 1 cup of water. Reserve remaining water. Blend on high until very smooth. If you have large chile skin pieces, you may strain the sauce through a wire strainer. I have a power blender and didn't have to strain.
- Pour in all of the blended chile guajillo sauce into the bowl. Mix and work the dough until it mostly comes together.
- Gradually mix in some of the remaining water. The water amounts may vary. I ended up needing 1/3 cup. At this point the dough should feel sticky. Knead the dough for 8-9 minutes or until it is mostly smooth and does not stick to your hands.
- Cover dough with plastic wrap and let it rest for 15 minutes.
- After 15 minutes, divide and shape 18 dough balls. Place them on a baking sheet. Rub some of the reserved 2 tbsps of shortening on your hands and fingers and press a light coat on the tops of all the dough balls. Cover again with plastic wrap and let sit for 10 minutes.
- Before the 10 minutes is up, start preheating your cooking surface. You want to start it on medium low and then turn up the heat slightly as you get closer to rolling out your first tortilla.
- When you are ready, dip the dough ball in the reserved flour. Place on flat work surface. Using a rolling pin, gently begin to roll up, slightly rotate, roll up, then down. The key is to rotate slightly to achieve a more round shape. When needed, dust lightly with flour if pin begins to stick. As the tortilla begins to extend, apply more pressure as you roll out for thinner tortillas.
- Cook on preheated griddle for about 30 seconds on the first side. You should see bubbles and hear sizzling sounds as soon as you lay the tortillas on the hot surface. When there are a lot of bubbles, flip the tortilla. Cook for another 25-30 seconds. Some will inflate more than others. If the spots are too dark, reduce the heat slightly. Place cooked tortillas in a tortilla warmer lined with a kitchen towel. The stacked tortillas will steam and help soften the tortillas. Store cooled tortillas in a plastic storage bag on the counter for a few days or refrigerated for 7-8 days.
Notes
Whole Wheat w/ Jalapeno
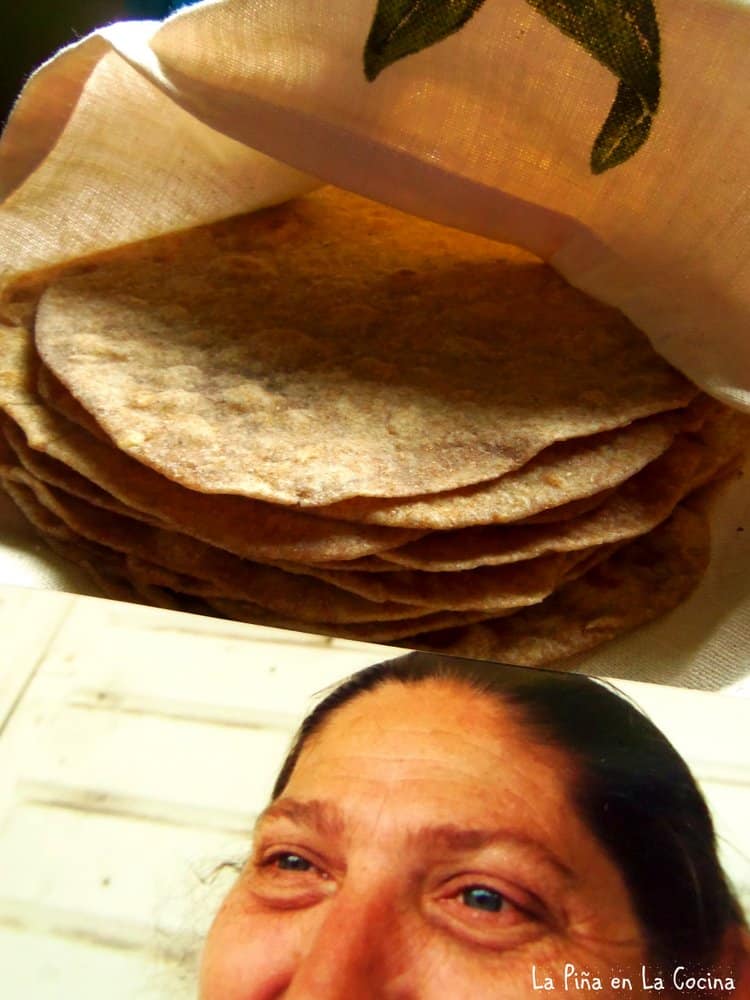
Ingredients
1/2 cup vegetable shortening or manteca (lard)
2 1/2 to 3 cups whole wheat flour
1 teaspoon baking powder
1 teaspoon salt
1 tablespoon crushed jalapeno flakes (optional)
1 cup hot water
1. Melt the shortening or lard, add the water, salt and baking powder. Gradually add in the flour and jalapeño flakes, if using until dough forms. Make 15 to 18 dough balls, cover with plastic wrap, set aside.
2. Preheat a comal or large griddle pan to medium heat for 5 minutes. On a lightly floured surface, roll out tortillas to about 5 to 6 inches. Cook on the hot comal for a minute on each side or until you get some nice light brown spots. Keep warm in between two kitchen towels. Cool completely before storing in airtight storage bag in the refrigerator.
~~~~~~~~~~~~~~~~~~~~~~~~~~~~~~~~~~~~~~~~~~~~~~~~~
Chile Infused Tortillas Using Chili Powder
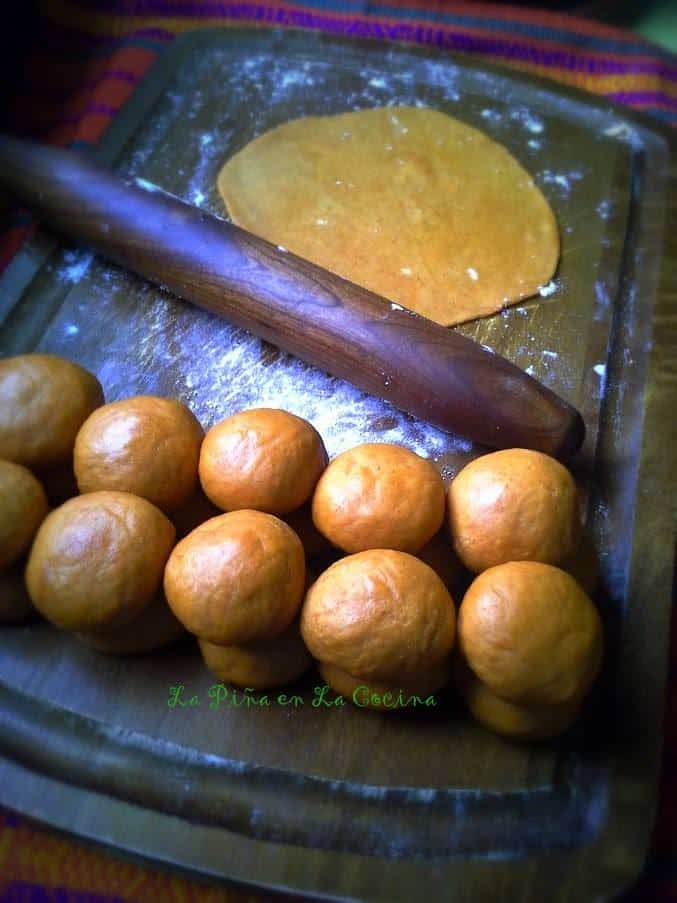
1/2 cup, plus 2 tablespoons crisco shortening, melted
1/4 cup gebhardt chili powder (I used Gebhardt brand)
1/2 to 1 teaspoon salt
1 cup hot twater
3 cups all purpose flour, plus more for dusting
1 1/2 teaspoons baking powder
*yields 24 to 26 small tortillas
Directions
1. Melt the shortening in a large glass bowl. Stir in the chili powder, onion powder and salt. Stir in the hot water. Add 1 cup of flour and baking powder and stir well to combine. Gradually add in the remaining flour until smooth dough forms. You want the dough to be slightly sticky and moist. Cover and let sit for 30 minutes.
See Cooking Directions Above
~~~~~~~~~~~~~~~~~~~~~~~~~~~~~~~~~~~~~~~~~~~~~~~~~~~
Annatto Infused Tortillas
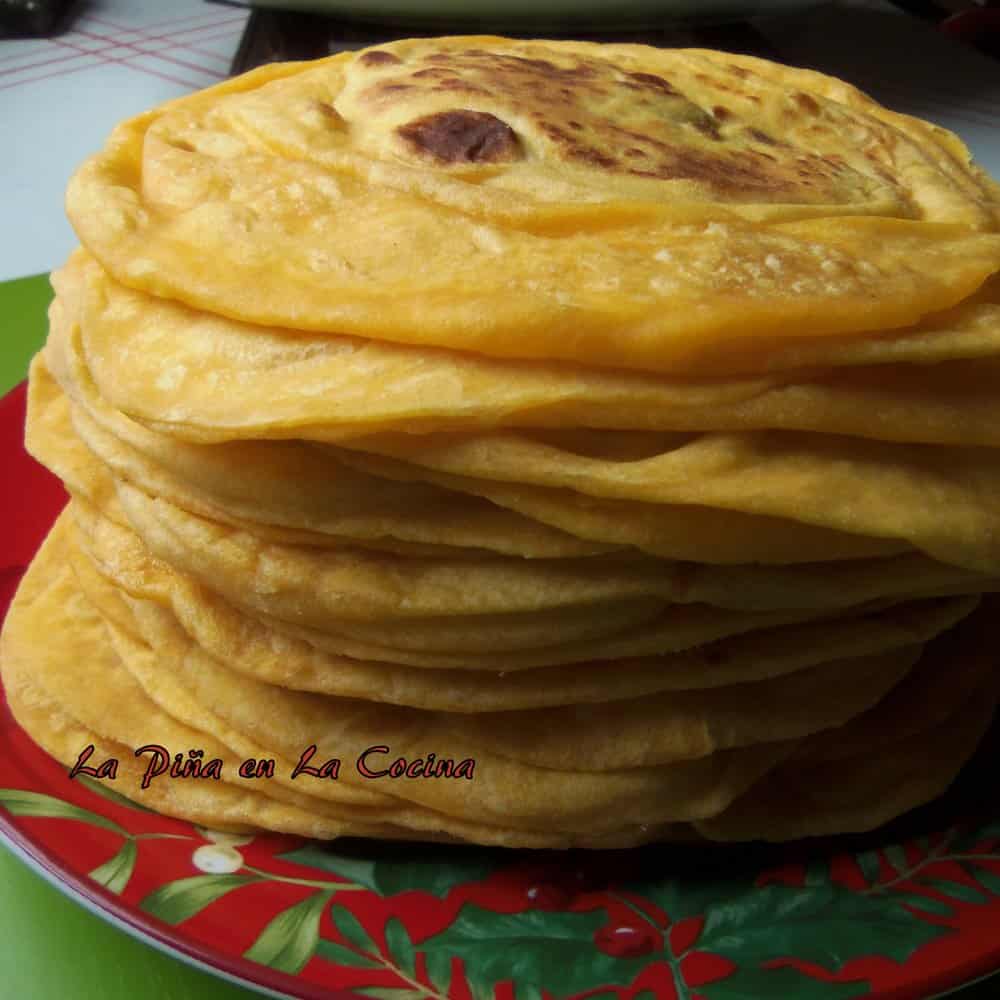
1/2 cup vegetable shortening
2 tablespoons annatto seeds
1 cup hot water
1 teaspoon salt
1 teaspoon baking powder
3 cups of flour, plus more for dusting
See Directions Above
~~~~~~~~~~~~~~~~~~~~~~~~~~~~~~~~~~~~~~~~~~~~~~~~~~~
Tortillas Prepared with Coconut Oil
I am really loving this coconut oil! Just finished up my first jar with this batch of flour tortillas~

1/2 cup coconut oil, warm to soften
1 cup hot water
1 1/2 teaspoons baking powder
1 tablespoon jalapeño pepper flakes, optional
1 teaspoon salt
1/2 teaspoon cumin
3 1/2 cups all purpose flour, sifted, plus more for dusting
Directions
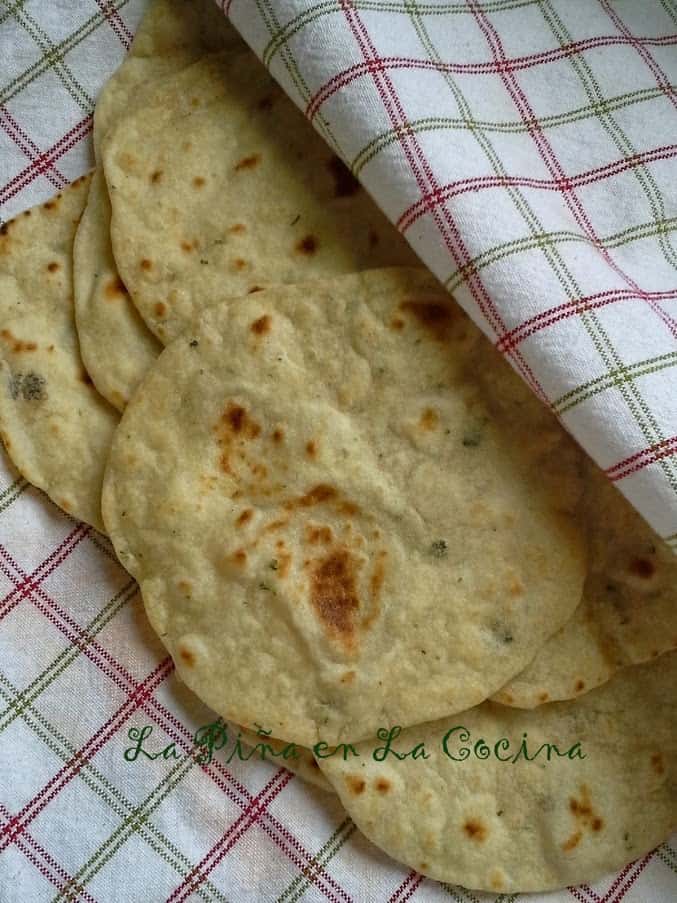
1. Combine the coconut oil, water, baking powder, jalapeño flakes, salt and cumin. Stir gently and gradually add in the flour until the dough forms. Make 18 to 20 dough balls, transfer to a plate, cover with plastic wrap and let them rest for 1 hour. See directions above for cooking instructions.
~~~~~~~~~~~~~~~~~~~~~~~~~~~~~~~~~~~~~~~~~~~~~~~~~~
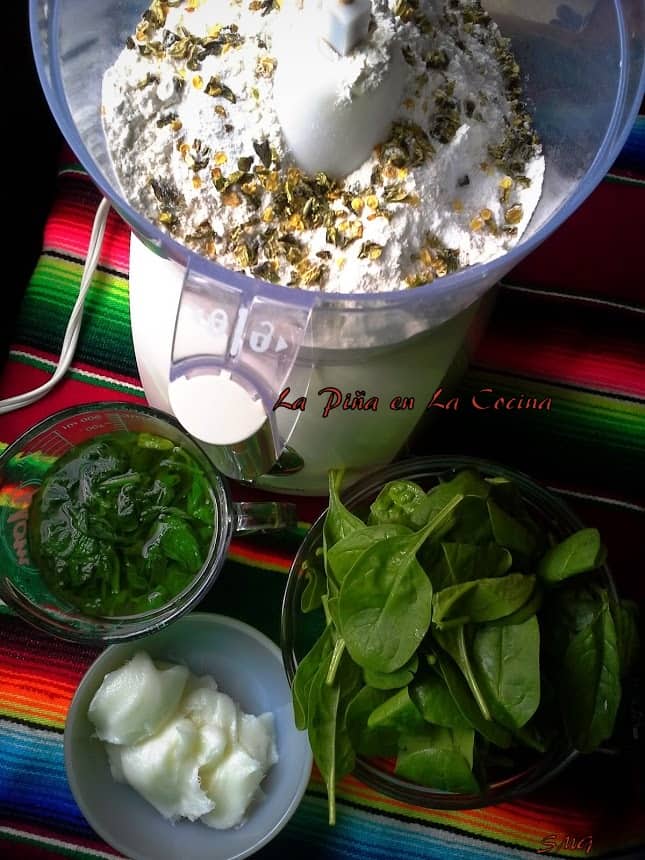
Spinach and Jalapeño Tortillas. This was a fun and new recipe for me to try. This was my first time preparing tortilla dough in my food processor. I cannot take credit for this tasty recipe. I stumbled upon this recipe on Pinterst on the blog site Delightful-Delicious-Delovely, owned by Christine Elise McCarthy http://delightfuldeliciousdelovelyblog.wordpress.com/2012/12/14/margarita-pizza-quesadilla-on-homemade-spinach-tortillas/
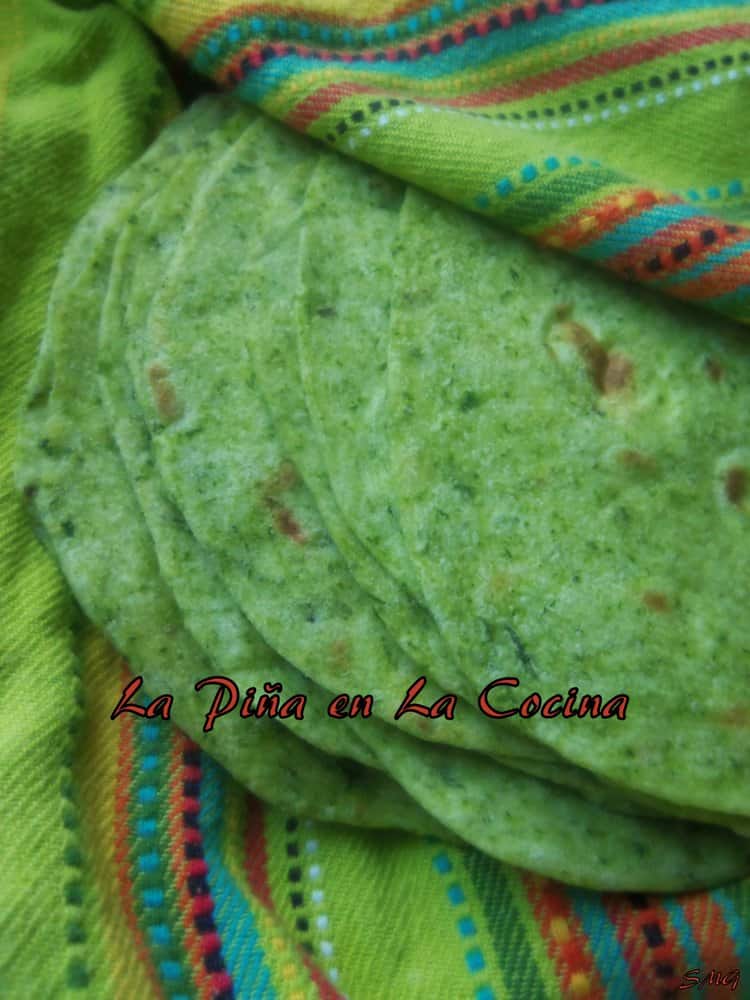
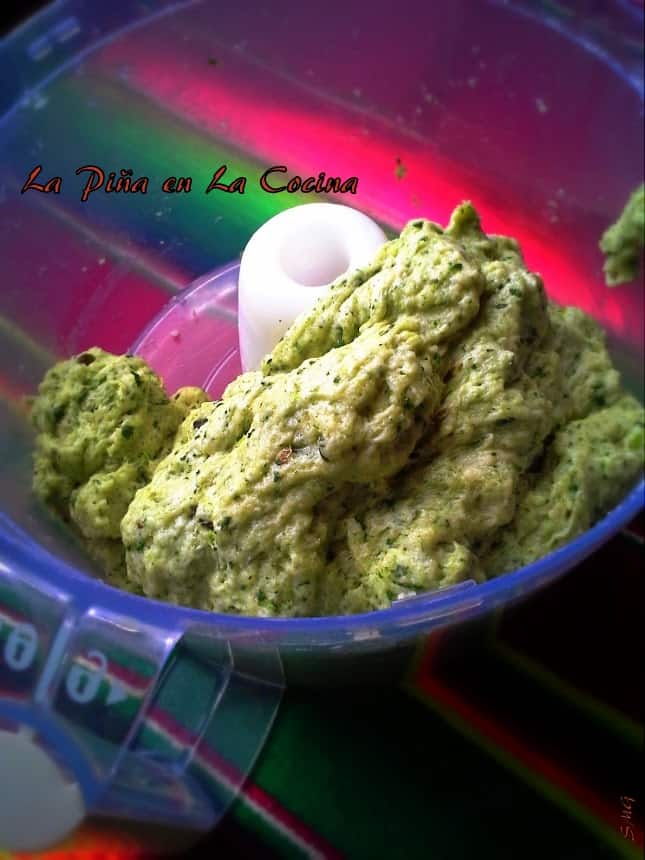
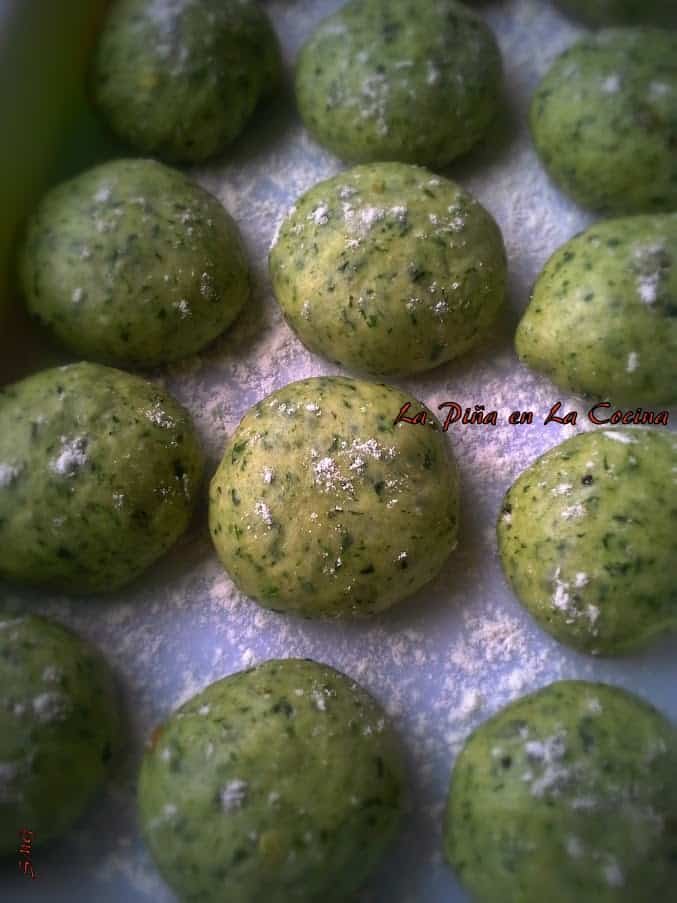
I absolutely loved how the dough came together and how quick it was using the food processor. If you know me, I of course had to add my own touch to this great recipe. Instead of olive oil, I used manteca (pork lard) and I added a full tablespoon of dried jalapeño flakes. The results were a super soft and flexible tortilla, very easy to roll out without much effort at all. I will be preparing these again and can’t wait to try some other add-ins, such as sun dried tomatoes, caramelized onions and toasted garlic. The pictures I share with you today are my own, but do check out Christine Elise McCarthy’s blog site for some great Food Porn!!! Lol!
Spinach Jalapeno Tortillas
2 cups (packed) fresh baby spinach
1 1/2 cups water
3 cups flour, plus more for dusting
1 tablespoon dried jalapeño pepper flakes
2 teaspoons baking powder
1 teaspoon salt
6 tablespoons pork lard, manteca, melted (or olive oil as stated in the original recipe)
1. Add the spinach to a pan with 1 1/2 cups of water. Heat to medium and cook just until spinach has wilted. Remove spinach from pan, reserve the water and rinse spinach under cool water. Squeeze out as much of the liquid as possible and drop it into a 2 cup measuring cup. Add enough spinach water until you reach the 1 1/2 cup mark, set aside.
2. In the food processor, add the flour, jalapeño flakes, baking powder and salt. Pulse to mix until combined. Add the melted lard, shortening or oil and pulse until mixed in. Add in the spinach, minus the water and process one more time. Stream in a little of the water from measuring cup until the dough forms. It will gather on one side and form a dough ball.
3. Remove dough from processor onto a lightly floured surface until soft, but not too sticky. Roll 15 medium dough balls and flatten slightly. Cover with plastic and let set for 30 minutes to 1 hour.
4. Preheat a large comal or griddle pan to medium heat for 6 to7 minutes. On a lightly floured surface, roll out the tortillas to about 7 inches in diameter. Cook on hot comal for 20 to 30 seconds per side. They should start bubbling up as soon as they hit that hot surface. Keep warm in between a kitchen towel until all done. Cool completely before storing in an airtight container in the refrigerator for up to a week. Reheat on a warm comal or griddle. Depending on how big you want the tortillas, this recipe yields 15 to 20 tortillas.
Soft Flour/Corn Tortilla. A fusion of both flour and corn! Click onto picture to see full recipe on site.
Reader Interactions
Comments
Trackbacks
-
[…] My Mom’s Flour Tortillas https://pinaenlacocina.com/tortillas-a-staple-in-the-mexican-kitchen/ […]
-
[…] Flour Tortillas! https://pinaenlacocina.com/tortillas-a-staple-in-the-mexican-kitchen/Chile de Arbol Salsa/Hot Sauce! […]
where can i buy La PINA flour in orange county california i can not find it in any of the stores around here anymore why?
Oh Esther, I wish I could answer that question for you. I have never seen it in my travels. I ordered La Selecta from MexGrocer recenlty just to try it out. I will ask some of my friends who live in California.
Esther, I researched a little online to see where La Pina flour was available and I read in several places that General Mills had discontinued making it.
My Mom gave me her dishes that were in bags of La Pina flour she purchased to make homemade tortillas. I wish I did not have to part with them but for health and financial hardship, I have no choice. I am looking for an honest person(s) to purchase them.
Wow, Lydia, that is a hard choice. I could not imagine having to part with them. I have never even seen that brand of flour, but in pictures.
It was one of the hardest decision I had to make. My Mom passed last year. She was very proud of her collection of these dishes and I was very honored when she gave them to me. She knew I enjoy cooking. I never remember my Mom using them and to date, I have not used them. So afraid that I may break one. They are the most beautiful dishes I have ever seen. A gentleman wearing his sombrero and a serape over his right shoulder, on bended knee with a guitar in hand. Above him the sun is rising and he is serenading someone on the balcony. But you cannot see who it is, only a beautiful, colorful cloth draped over the balcony. It reminds me of one of my favorite movies,
“A Walk In The Clouds” with Keanu Reeves and Anthony Quinn.
Sounds beautiful. I do love that movie. Wish I could help you out, but it’s not possible for me to to offer anything for them at this time. If you sent a picture and a price I would put them out there for you.
Are your plates still for sale. I love to cook and instagram my food on beautiful plates.
Hi! Is there a way we can adapt this recipe for tortillas para gorditas? Es que se me antojaron…
Hi Peter! I do have a recipe for gorditas de harina, both sweet and savory. Here is the link for the savory. I also have a recipe for the masa harina gorditas.
https://pinaenlacocina.com/gorditas-de-harina-rellenasstuffed-gorditas/
Muchas thanks! 😀
Thank you!
Not sure if I’m posting in the correct area to win but 5 pounds?
Yes!! Yes it was 5 pounds ! Winner #1!!
5 pounds!!! 😉
Winner #2!! Yay! Inbox me your address on Instagram.
5 lbs
Yay! Winner #3!! Inbox me your address on Instagram.
Ahhh I’m late!! Lol 5lbs congrats to everyone!!
I will have more giveaways America! This was fun!! Just for participating in my first giveway, inbox me your address on Instagram! 🙂
Bummer!!!
There will be more spontaneous giveaways soon! Thanks for taking the time to answer Ana!
Your recipe is interesting. I’ve never seen a recipe for flour tortillas that has you mix in the flour at the end. Your masa looks very supple and perfect. I will have to try it your way.
Thank you! This is the recipe I learned from my mom, except she would prepare a whole 5 pound bag of flour all at once. No measuring.
Hi, how do you get your tortillas from getting hard once they’ve cooled down? After I made you recipe they got tough even after reheating.
I only air them out just until cooled. I immediately store them in a plastic storage bag and in the refrigerator. When I reheat, it has to to be quick and really hot. Don’t leave them on too long or they will dry out. I place them in a covered thermal tortilla warmer. The steam created will soften once again. Masa harina tortillas are are not as forgiving as fresh ground masa tortillas.
I keep my tortillas covered the whole time until I am ready to store them. I don’t let them sit out too long, maybe a few minutes to air out, before storing them in a plastic storage bag. I keep them at room temperature for 1 or 2 days before refrigerating them. They will dry out as the days go by. They are best enjoyed when fresh. To reheat them, I preheat my comal(griddle) until very hot. I warm the tortillas for just maybe 30 seconds per side then back in a tortilla warmer so they get steamy and soft.
Thank you!!!
You’re welcome Jackie!
Yes, I was guilty of rolling out many states! My mom also never measured out anything. It made me crazy, especially when she taught me how to make tortillas. I remember her saying “OK, now add a handful of salt.” ME: “How much is a handful?” MOM: “A handful!” ME: “But my hands are bigger than yours.” MOM(totally exasperated): “Just. Add. A. Handful.” Guess what? The masa was too salty!
Thanks for including the add-ins. I still can’t roll out a round tortilla, but I want to try the different flavors.
The curious cook in me likes to play with the tortilla recipe. Both in the flour and corn tortillas. I enjoy the process ans seeing how they come together from the simple ingredients. If I try to rush the tortillas, they come out looking like the state of Texas! Lol!
OMG! Alicia, I was looking thru my old emails and saw this one from you. I just saw this! If by any chance you are still interested please email me.
Lydia
Sonia!!!!! I made the flour tortillas! Tried countless recipes, but was unsuccessful! Your recipe was perfect! First time my tortillas actually looked like tortillas lol
Erika, Oh My! That is wonderful! Thank you for letting me know. So happy it worked for you! My mom would be so happy!
I am using this recipe for the second time now. The first time was amazing. I thought flour tortillas were hopeless for me. Before this recipe they always looked like pitas instead. I will admit to using a tortilla press after not getting great results with a rolling pin. I also tried one of your corn tortilla recipes today and it is such an improvement over ones I’ve made in the past.
Did the press work on the flour tortilla dough? I can’t press it hard enough to get the thin tortilla for flour. Thanks Stephanie!
I can’t get them thin enough with the rolling pin. That’s why I used the press. They’ve come out beautifully. I’m back again…this time I’ll print the recipe. 🙂
Ok
I love your tortilla recipe! I remember my grandma teaching me how to roll tortillas and she would also not go by measurements when making the masa. Looking forward to trying some of the tortilla variations that you include. Thank you for sharing!
You’re welcome Feli! I never measure when I prepare tortillas either, But had to come up with a recipe to share with everyone. Have fun trying some of the variations.
Your recipes never fail me. I always wanted to make my own, but was a little intimidated. Your ratios are perfect. Thank you.
Thank you so much Elizabeth!
First time making tortillas, ON MY OWN, without asking for advice from my mom. Lol I can safely say they came out DELICIOUS and I love that I didn’t have to hear “nomas tanteale” when adding ingredients. 😅 Because until I can get a hang of it….this lady needs measurements! Lol
On the other hand, they were all sorts of shapes but a circle. 😅 Any tips?
Hi Conny!
I find that the more I roll out the tortilla, the more odd shapes I get, lol! I try to roll slightly and rotate a little. It’s a fast process once you get the hang of it. As you get to the center of tortilla with rolling pin apply more pressure, then stop and rotate. I find that the smaller rolling pins without handles work best for me. I feel I have more control on turning it to shape the tortillas.
The tortillas were the best I’ve ever had. I made then by hand for my first time ever with this recipe. Really reminded me of the ones I ate in Mexico. Thank you for this recipe.
Hi Miriam! I really appreciate you taking the time to comment on the flour tortilla recipe. So happy you enjoyed it!
This is the best recipe and story about learning to make great tortillas. My great grandmother used to stand in her kitchen nearly all day making tortillas, beans and red chili meat (beef roasted with large red hot chilis laid across the top). The meat was spicy and delicious and was amazing with beans and her tortillas. This is my best memory of her and I think she would be proud to know I’ve come along way from my thick version of a tortilla.
Hi Debbie! The food memories are the best. They are so vivid in my mind. The sounds, the colors, the aromas… Thank you for stopping by and taking the time to write.
Hello, I was just curious if you changed the base flour tortilla recipe? I’ve been using this recipe for years and now today I was noticing something looked off. As in the amount of lard/oil to use from .5 cups to now 3-4 tablespoons and the resting time seems different too.
Thank you for sharing this recipe!
Hi Renee. Over the years I have experimented with the ratios to try and achieve a dough that is easier to roll out and that can be rolled out thinner. I love the original recipe, but have since then come up with a ratio that seems to work faster. For every 1 cup of flour, I add 1 tbsp of lard and about 5 oz of water. The salt is up to you. Most times I don’t use baking powder. I have posted the original recipe in the notes at the end of the recipe. I discovered that the dough only needs about 30 minutes resting time in total. I form the dough, let it rest about 15 min. Then form the dough balls and let them rest for another 10-15 min. They roll out beautifully. if you look up the no baking powder recipe on my blog, you will see the difference there. As I said, the original recipe is there if that works for you. Thank you for taking the time to write.