• Skip to main content
  • Skip to primary sidebar

La Piña en la Cocina

Embracing my Mexican heritage and sharing all the wonderful flavors, colors and foods I grew up with. Join me on this journey as I also learn new foods and cooking techniques. Dedicated to my parents Ramiro and Blanca.

  • Home
  • Recipes
  • About
    • Mexican at Heart
    • Media
  • Contact
  • Disclosure/Privacy Policy
Home » Tamales » Chile And Cheese Tamal! September!

Chile And Cheese Tamal! September!

September 15, 20212 Comments

115 shares
  • Share
  • Tweet
Jump to Recipe Print Recipe

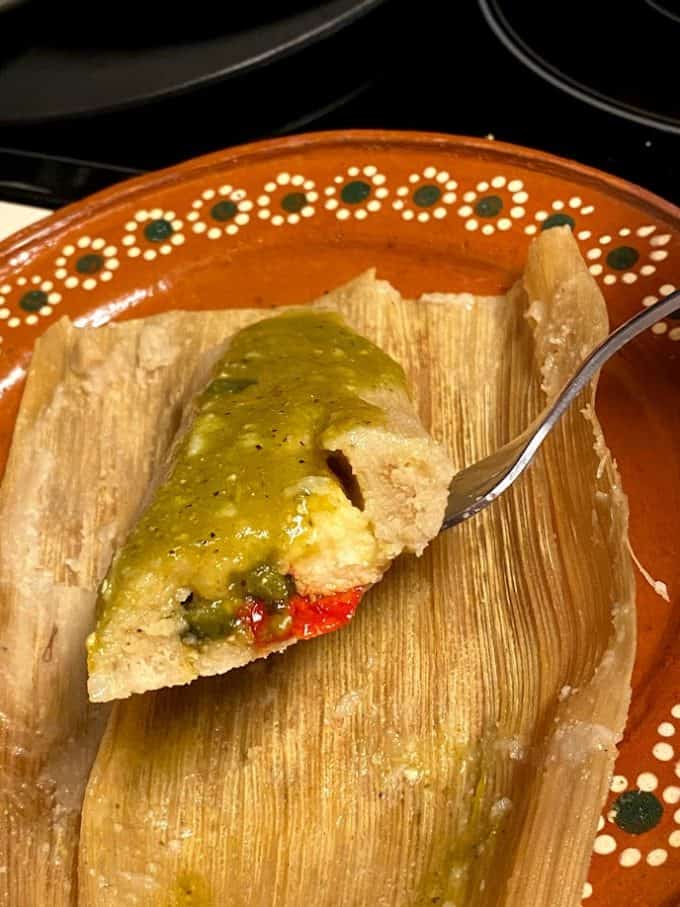
Chile and cheese tamal (rajas con queso)with the colors of the Mexican flag(bandera Mexicana)! Today, September 15th, in honor of Mexico’s Independence Day, I am sharing this tasty tamal de rajas con queso with you all. Viva Mexico!!

chile and cheese tamal close up

Besides Pork Tamales, This Chile and Cheese Tamal is my favorite!

I crave this chile and cheese tamal! What are some of your favorite tamales??

https://animoto.com/play/IoxauRmQHo9X9jbW6xb1vA

Keep It Simple!

As you scroll down through the photos, I will take you step by step on how I prepared these delicious tamales! The photos are not fancy or styled, just real as I was working that day.

top view of chile and cheese tamal

Make Sure The Salsa Is Ready!

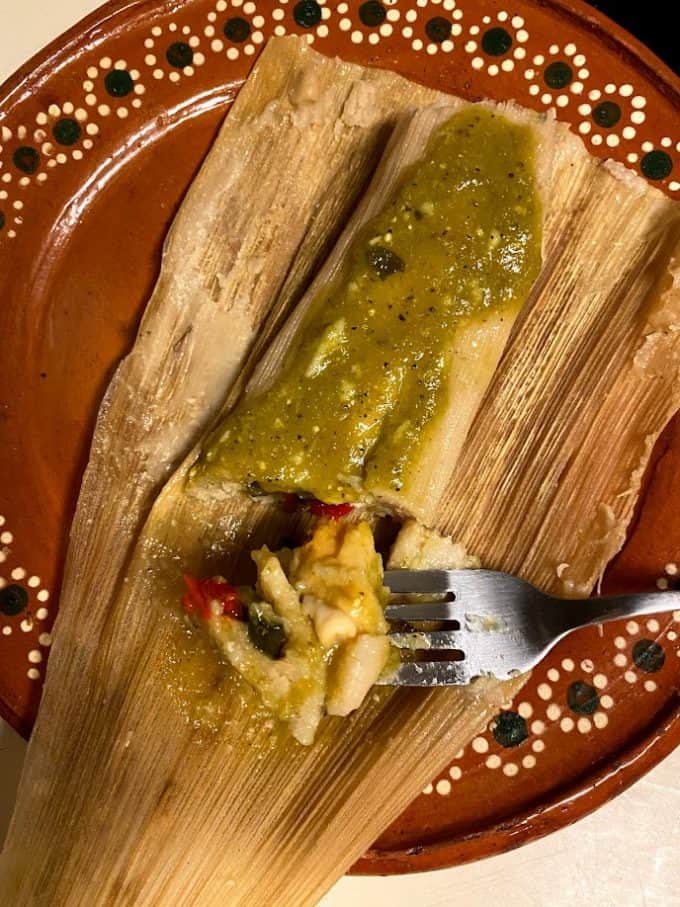
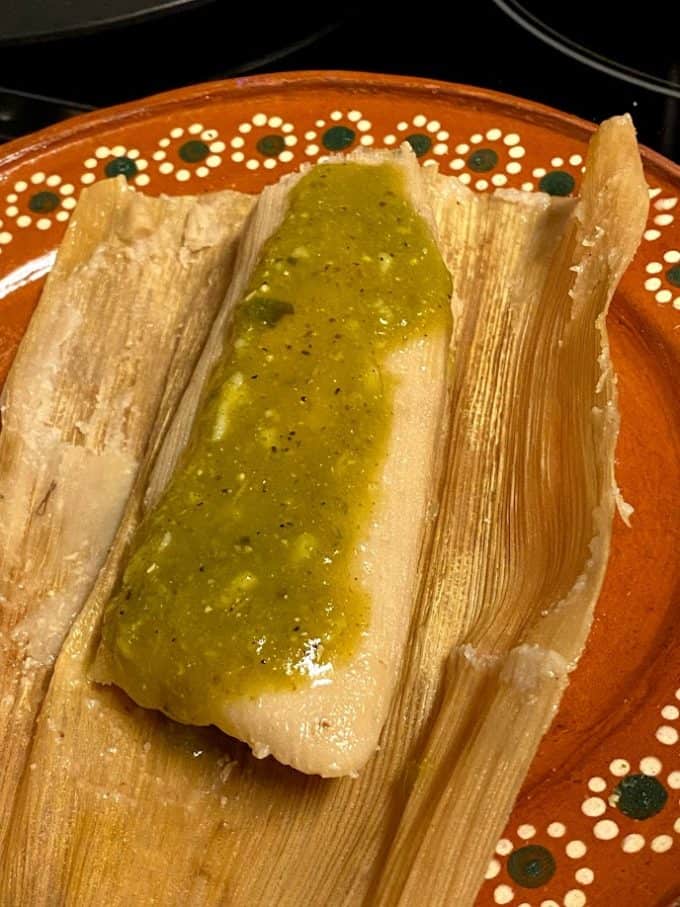
Some people prefer to enjoy there tamales with no salsa garnish. I respect that, but mom always prepared her signature tomatillo chile de arbol salsa when it was tamal season. Like tacos, the salsa can be red or green to suit your taste. A good and well seasoned tamal should stand on it’s own without the salsa, but I love salsa! Lol!

close up of chile and cheese tamal close up with salsa verede
I tend to favor any salsa prepared with tomatillos for my tamales. But, if there’s only red, then red it is! Lol!
unwrapping hot tamal
Can tamales be prepared without the corn husk? I get that question a lot. They can using parchment paper or deli paper sheets and or foil paper, but it’s not the same. The flavor that the corn husk adds is so tasty and traditional!
open steamer pot with fresh cooked tamales
Many times people will pull the tamal to test it and unwrap it right away. The tamal has to cool a bit in order to show if it’s really cooked all the way through. Remember there is pork manteca, lard in there that is hot and soft at the time. It need to cool to solidify a bit.
Steamer pot on stove top with reserved pot of water heating
Keep a pot of water on the back burner on low heat. You never want to add cold water to the hot steamer.
Tamales ready to be steamed, covered with extra corn husk
If you remember, soak your corn husk overnight. Next day, drain out the water and add fresh water.
tamales arranged in steamer pot befor cooking
This smaller steamer pot is good for about 20 medium tamales. Because it’s smaller, I know that it will run out of water close to the hour, so I add more hot water after 45 minutes.
soft corn husk at the bottom of steamer insert
A few soft corn husk at the bottom will keep the water from touching the tamales too much as they steam.
filling bottom of steamer pot with water
Have you tried the penny or dime trick at the bottom of the steamer pot? I didn’t add them this day and I regret it! Lol! I wasn’t paying attention and I almost burned my tamales. The pennies will make a rattling noise while the water is simmering. If you don’t hear any noise, then you are most likely out of water.
roasted poblano, queso fresco and queso fresco filling close up
Collage of how tamales are filled
collage on how to fill tamales
open tamal showing filling
collage showing how to fold tamales closed
collage of filling used with masa
collage of fresh ingredients used to prepare the filling
fresh red chile peppers
Red serranos and red jalapeños from the farmers market!
Tamal de Rajas Con Queso up close

Tamal De Rajas Con Queso! September!

In honor of Mexico's Independence Day, tamales with the colors of the Mexican flag. Roasted poblano, spicy red jalapeños, onion, garlic and creamy queso fresco!
4.75 from 4 votes
Print Pin Rate
Course: Main Course
Cuisine: Mexican
Prep Time: 1 hour hour 30 minutes minutes
Cook Time: 2 hours hours 30 minutes minutes
Resting Time For Masa and Cooked Tamales: 1 hour hour
Total Time: 5 hours hours
Servings: 33 Tamales

Equipment

  • Large Steamer Pot

Ingredients

Masa

  • 5 lbs masa preparada, prepared masa from the market or tortilla factory
  • 3/4 c pork lard
  • 3/4 c chicken broth
  • Salt or chicken bouillon, to taste

Rajas

  • oil
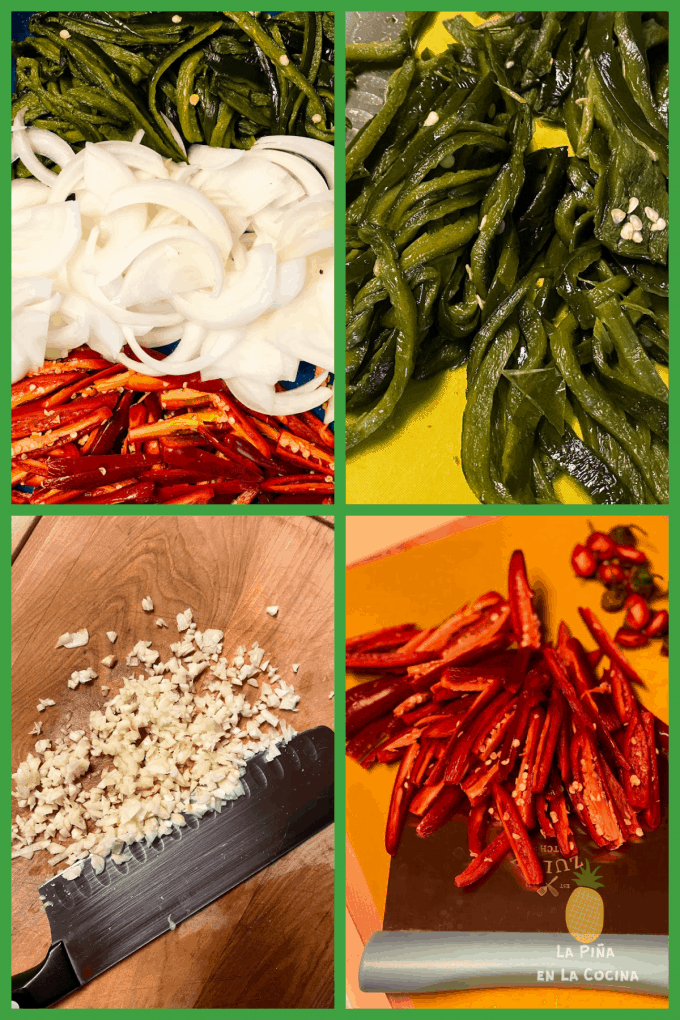
  • 1 large white onion sliced into strips
  • 4 large cloves of garlic minced
  • Salt and pepper to taste
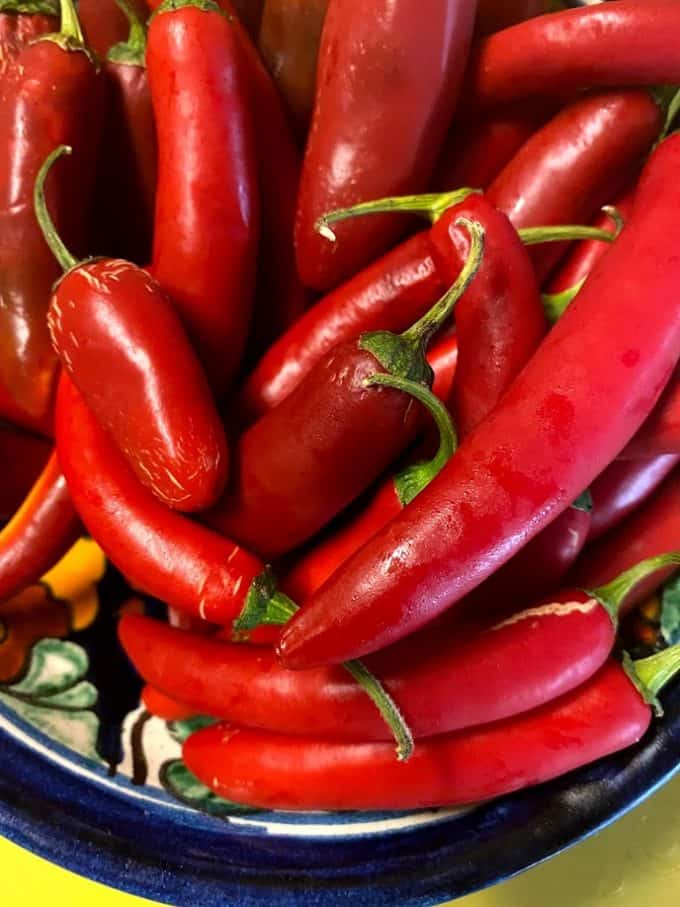
  • 10-12 large red jalapeños sliced into thin strips
  • 5 large poblano peppers, previously roasted, peeled and sliced into thin strips see notes for roasting method

You Also Need

  • 35 oz queso fresco or queso panela
  • 1 large bag of corn husk, 50 count

Instructions

Masa

  • This was my experience with that particular prepared masa. I can't say that they will all be that way though. This is why I prefer to prepare my own masa using masa harina.
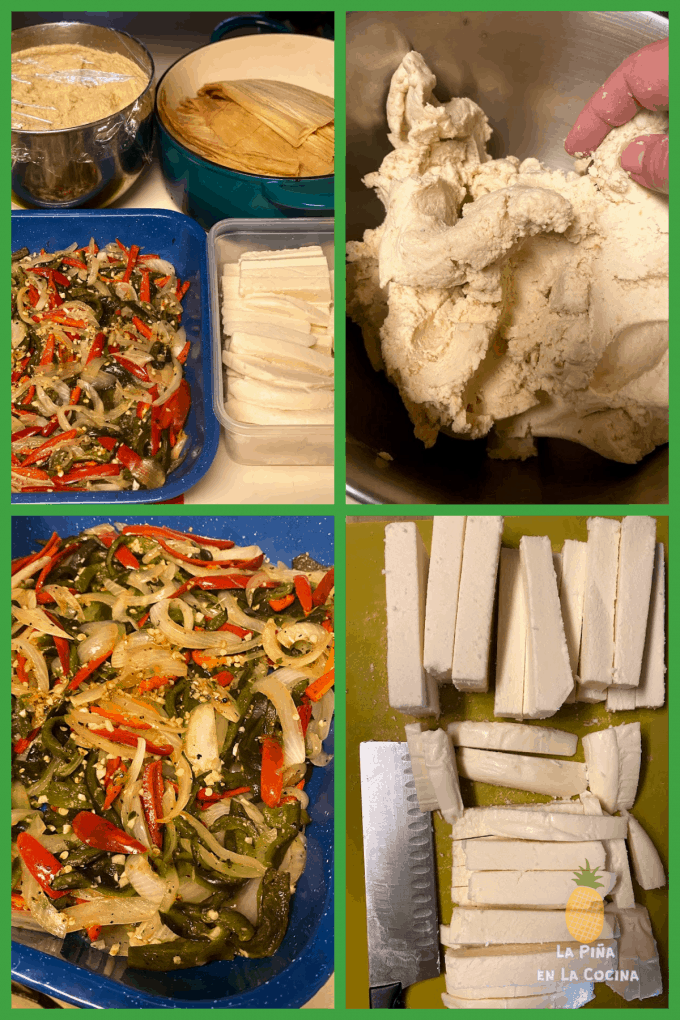
  • Transfer the prepared masa to the bowl of the stand mixer. Mix in the lard, chicken broth and salt to taste. Start speed on low and then gradually turn speed up to medium. Continue mixing the masa for at least 10 minutes or until it looks fluffy. It should be easy to spread. Cover and set aside.

Rajas

  • I a large pot, at medium heat, pour in 2 tablespoons of avocado or olive oil.
  • Add the onions. Season lightly with salt and pepper and saute for 3-5 minutes. Mix in the garlic and saute for another minute. Add the red jalapeños and saute for a few more minutes. Finally fold in the roasted poblano strips. Stir well to combine. Cook for another few minutes. Taste for salt.
  • Transfer to shallow baking dish to cool.

Queso

  • Slice the cheese into long sticks, about 3 inches long, enough for 30-33 tamales

Assembling Tamales

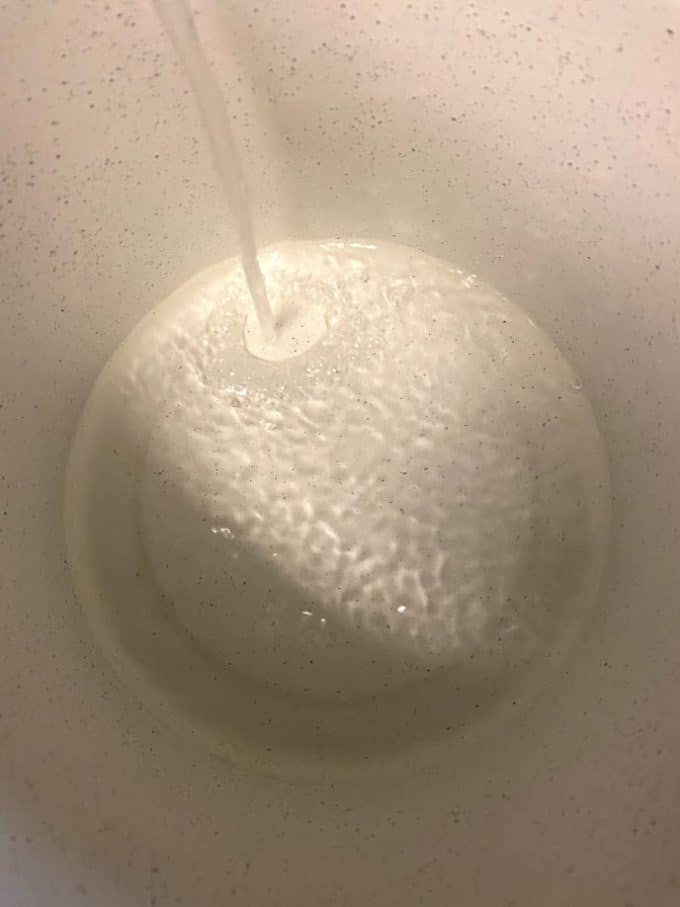
  • When ready, set out all of your ingredients with the softened corn husk nearby. You also need a dish or baking sheet to hold the filled tamales.
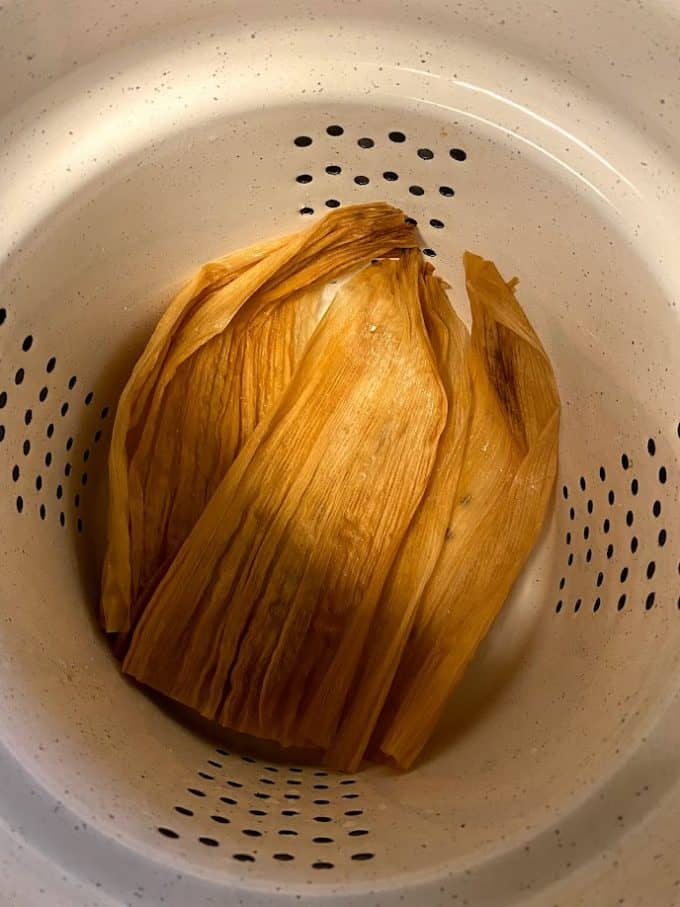
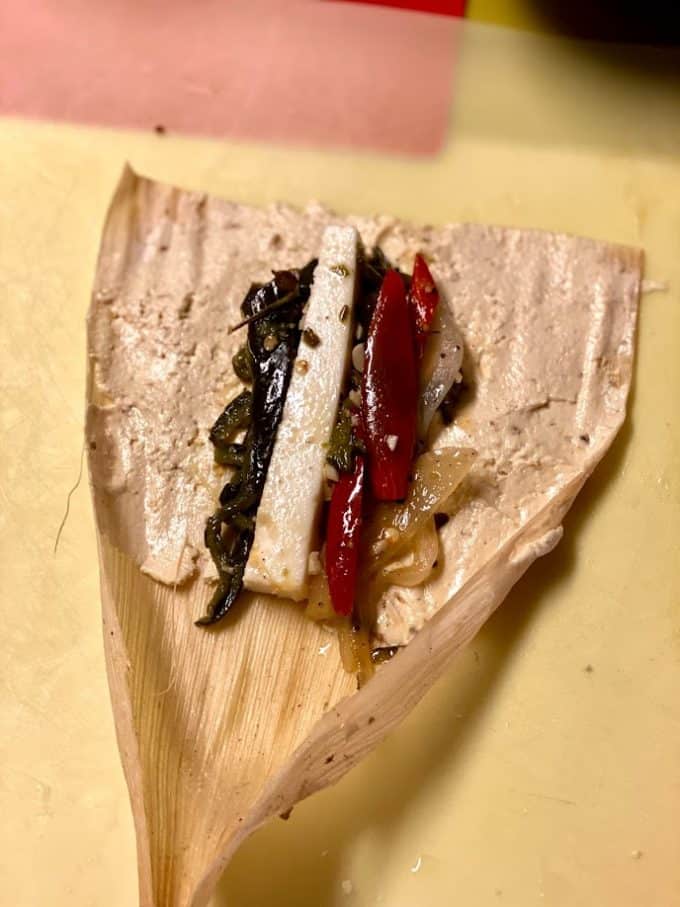
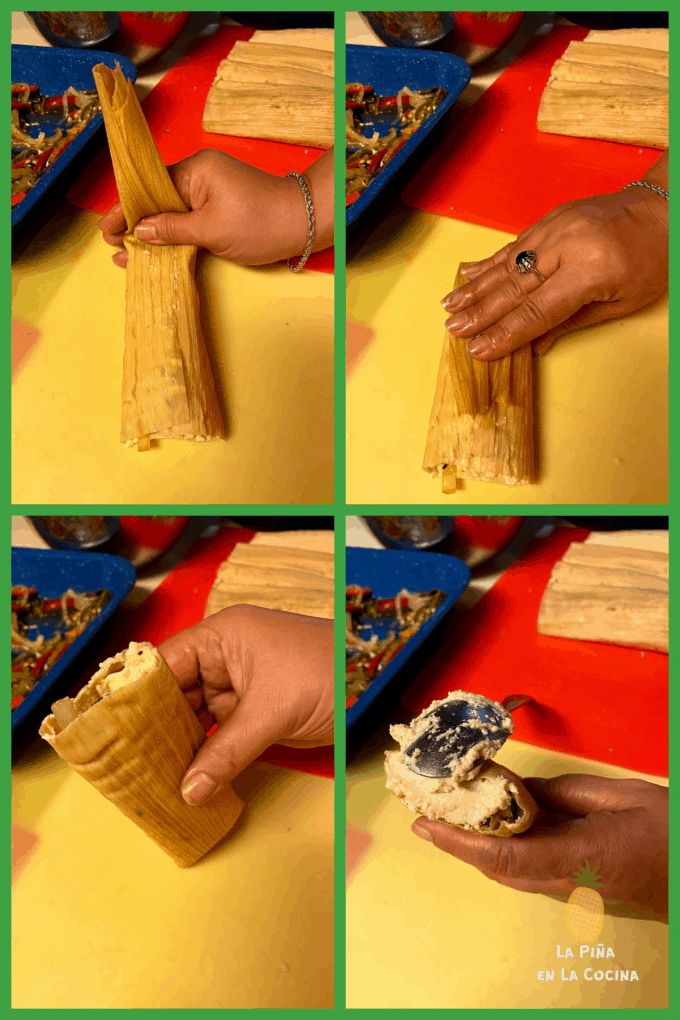
  • Take a husk and shake off excess water, Ideally I like the husk to only be 4 inches wide across the palm of my hand. It works better for me, but do what works best for you.
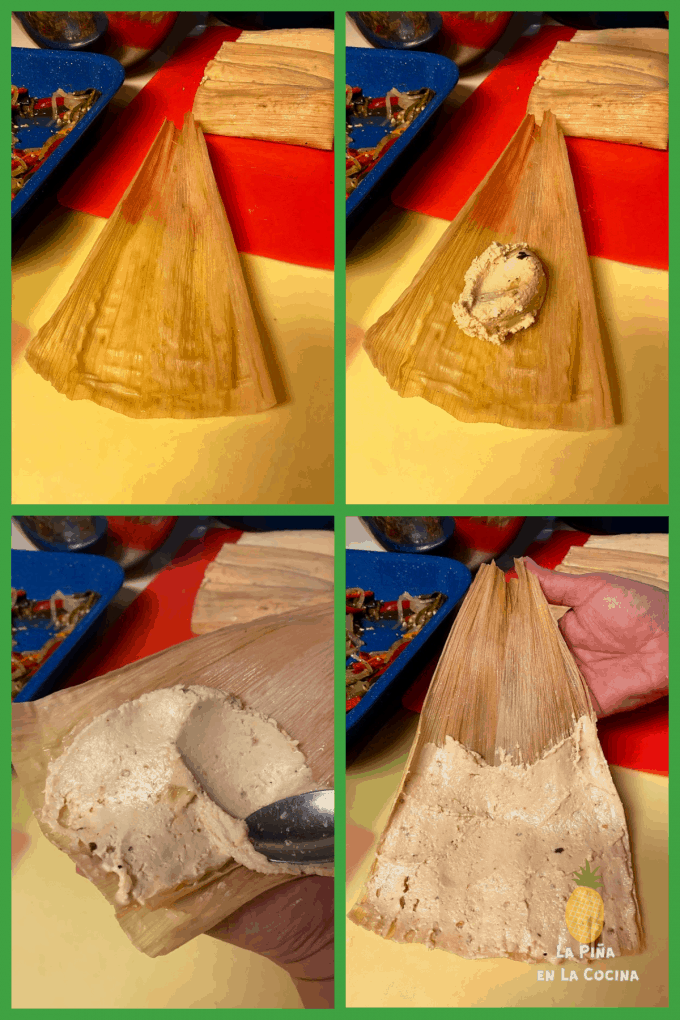
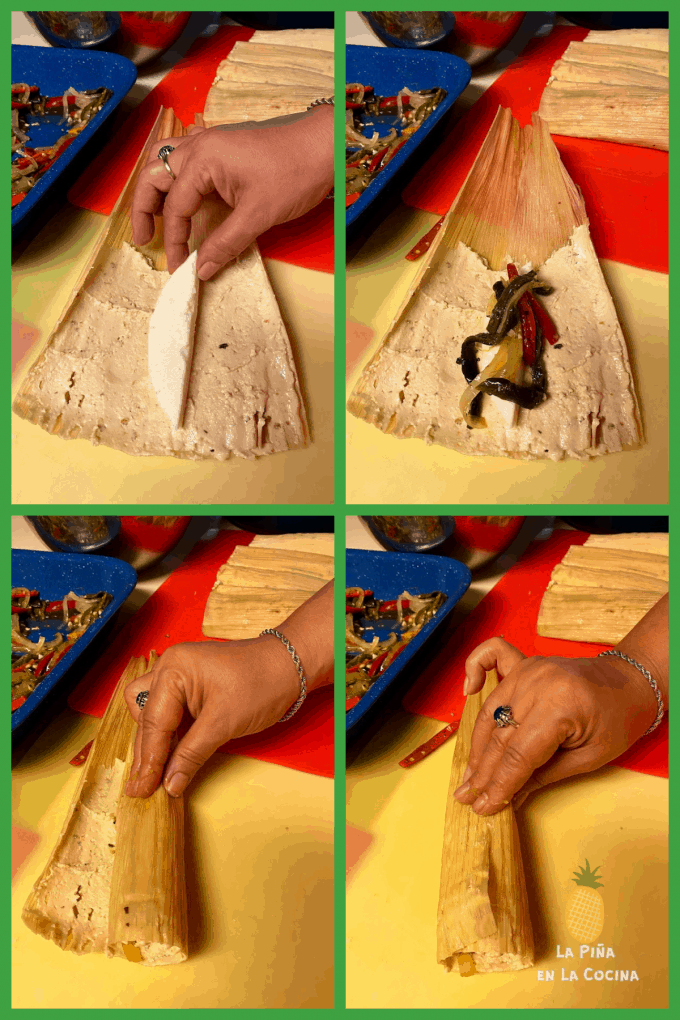
  • Take about 1/4 c of masa with a spoon and spread a thin layer across the bottom half of the corn husk. Add 1 piece of cheese and some of the rajas mixture. Fold in the sides of the tamal to cover filling. Then fold flap down and turn tamal open side up in your hand. Spoon in a little masa into the end of tamal.
  • Place filled tamal in pan or baking sheet until ready to steam. Depending on how big you prepare the tamales, this recipe can yield 33 tamales.

Cook Tamales

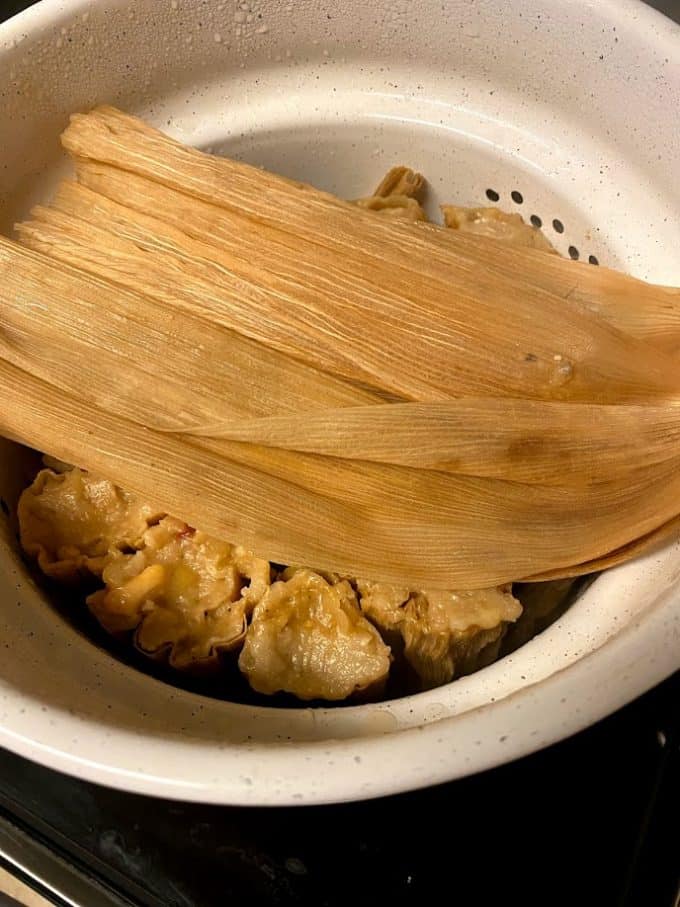
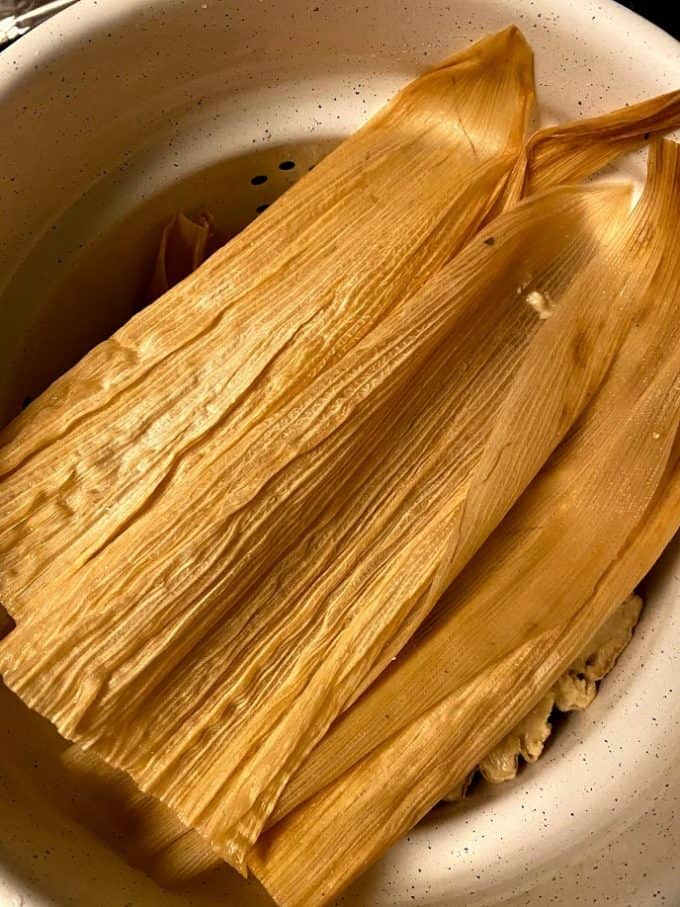
  • Fill bottom of steamer pot to level indicated on pot. If using the pennys, add two to the botton of pot into water. Add insert and place a few soft corn husk at the bottom of insert.
  • Carefully arrange your filled tamales, open side up in pot. You want them to stand up straight, if possible. Don't overcrowd the pot. My pot fits about 20 medium tamales comfortably. Every pot will be different.
  • Place pot on burner and begin heating on high. Cover tamales with a few more soft corn husk. Then place a dampened clean kitchen towel on top. Cover with lid.
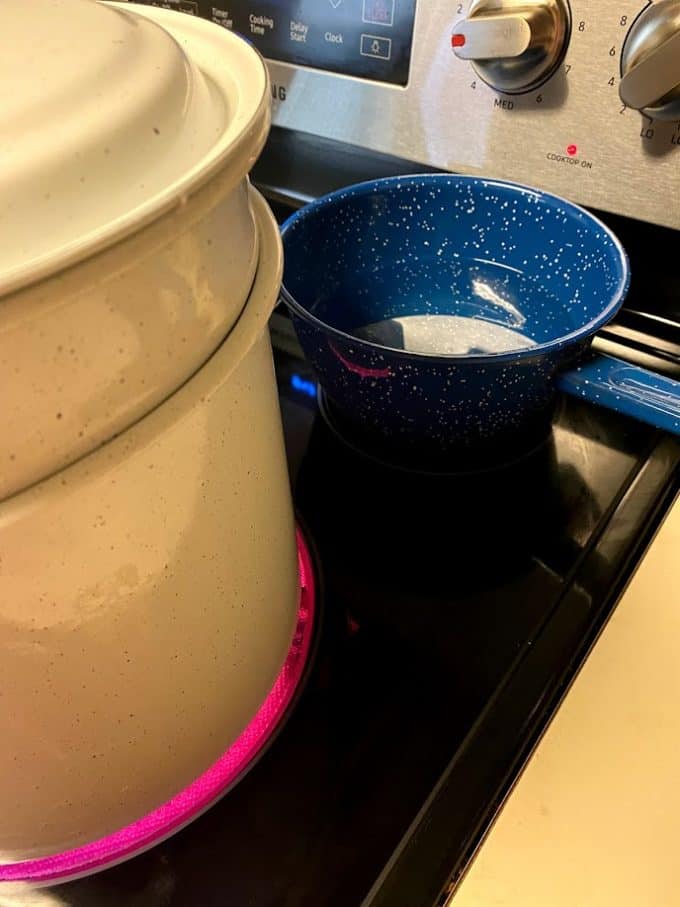
  • Once the the tamales come up to temperature and begin to steam rapidly, turn heat down to medium. Fill a sauce pan with water on the back burner and heat to low. Set timer for 45 minutes.
  • After 45 minutes, I carefully remove the lid and towl from the top of tamales. Pour in about 1 cup of water down one side of pot, avoiding water from touching tops of tamales. Place the towel and lid back in place. Set timer for 45 minutes once again.
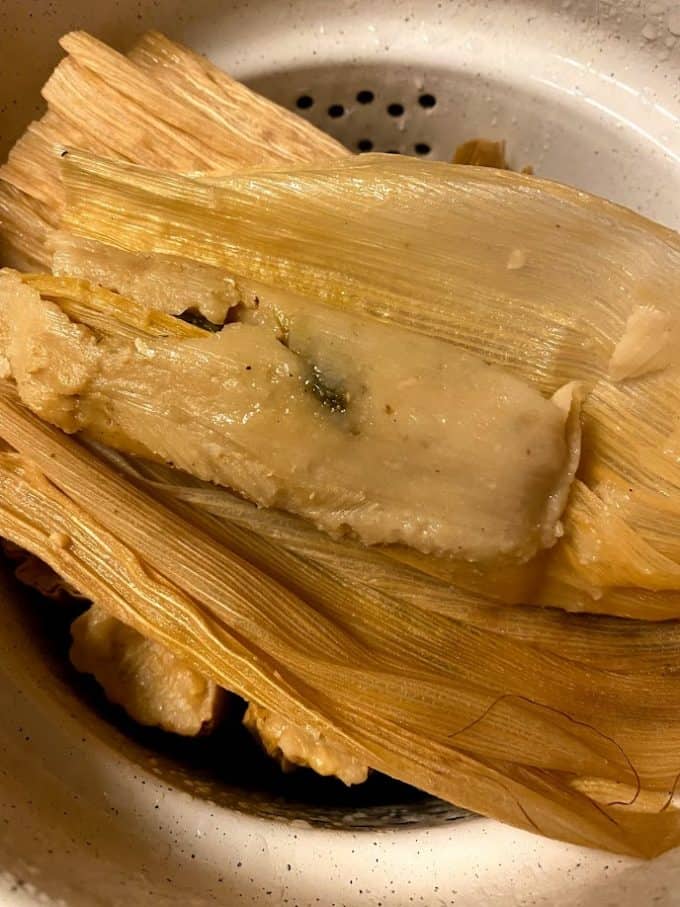
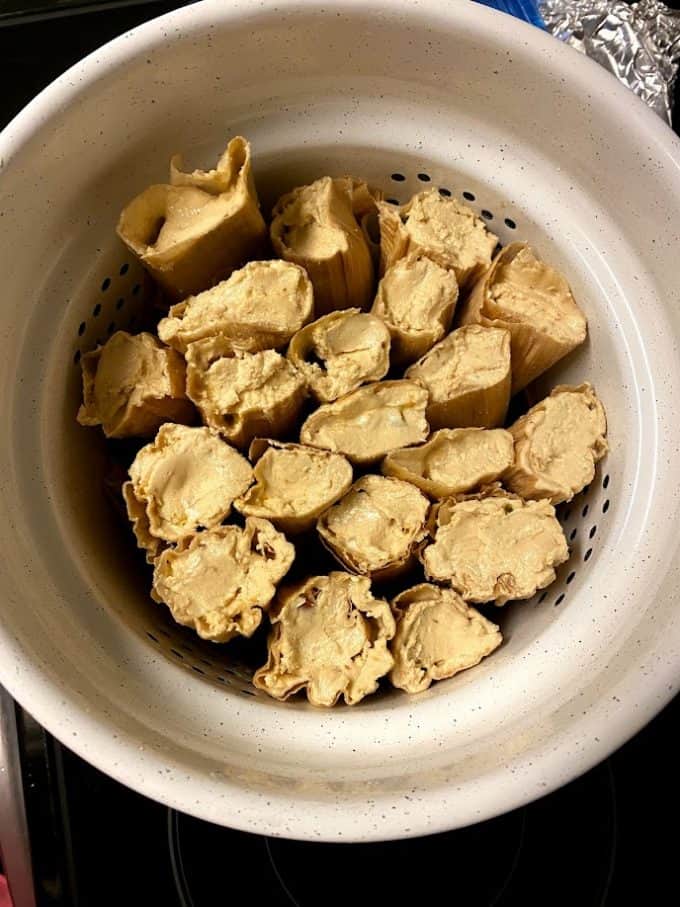
  • Once timer goes off, carefully take out one tester tamal and transfer to a plate. Let it cool for 5 minutes or so before attempting to peel corn husk away. If it comes away easily, then the tamales are ready. If its too sticky, then the tamales need to cook a little longer. I start checking every 15 minutes after that point.
  • Once tamales are cooked through, remove pot from heat and leave tamales in pot. They will stay warm for quite a while. If you want to cool them faster, lay them out on large baking sheet. Store in airtight containers or storage bags refrigerated for 5-7 days. Uncooked tamales can be frozen. Cooked tamales prepared with real masa like this hold up better in the freezer than the ones prepared with masa harina masa.

Notes

Easy, no mess roasting poblanos! Remove the stems and seeds from the fresh poblanos and transfer then to a wire rack lined with a baking sheet. Place rack with peppers about 6 inches under broiler that was preheated to high. Roast/broil the peppers for 10 minutes, turning as needed. Once skins are mostly blistered, transfer them to a plastic bag or clean kitchen towel. Let them steam and cool. Once cooled, remove blistered skins and slice in rajas(strips).
Tried this recipe?Mention @pinaenlacocina or tag #pinaenlacocina!

Like this:

Like Loading...

Filed Under: Meatless, Tamales Tagged With: Chile And Cheese Tamal, Rajas Con Queso Tamal, Tamales, Traditional Mexican Recipes

Previous Post: « Tri Colored Corn Tortillas
Next Post: Mole de Olla 2 »

Reader Interactions

Comments

  1. Stella

    September 16, 2021 at 5:49 am

    Great receta & great photos!! Tamales are super intimidating for me; mostly just because of the steamer pot. Your great pics and easy to understand instructions & tips (pennies!? no, I didn’t know!) make me feel like I can do it!!!! Thanks Sonia for all the wonderful the recipes, tips and detailed how-to’s! Love your blog so much. ❤️

    Reply
    • Sonia

      September 16, 2021 at 7:16 am

      Thank you so much Stella! I confess that I am a detail oriented person(Virgo), Lol!

      Reply

Would Love to Hear From YouCancel reply

This site uses Akismet to reduce spam. Learn how your comment data is processed.

Primary Sidebar

Welcome!

Hi, my name is Sonia Mendez Garcia. My parents Ramiro and Blanca Mendez moved to the United States from Monterrey, Mexico in 1963. I am first generation Mexican American born in Los Angeles, California. Cooking has always been one of my passions in life. This is my journey and I can't wait to see what the future holds. Read More…

Never Miss a Recipe

Get all the latest directly to your inbox

View Privacy Policy Before Subscribing

View our privacy policy

Mariscos-Seafood

Chilean Sea Bass in Adobo

chilean sea bass plated

Crispy Masa Crusted Shrimp and Poppers

popper with cheese and bacon filling

More Ceviche & Aguachile!

aguachile verde in a heart shaped cazuela

Filetes de Pescado al Ajillo-Garlic Butter & Lime Cod

You might also like…

Tacos con Sabor “Al Pastor” (Quesadillas Gringas)

Chile de Arbol Ahi Tuna Tacos

Gorditas de Azucar (Sweet Griddle Cakes)

Copyright © 2025 LA PIÑA EN LA COCINA

115 shares
MENU & SEARCH
  • Home
  • Recipes
  • About
    • Mexican at Heart
    • Media
  • Contact
  • Disclosure/Privacy Policy
We use cookies on our website to give you the most relevant experience by remembering your preferences and repeat visits. By clicking “Accept”, you consent to the use of ALL the cookies.
Do not sell my personal information.
Cookie Settings Accept
Manage consent

Privacy Overview

This website uses cookies to improve your experience while you navigate through the website. Out of these, the cookies that are categorized as necessary are stored on your browser as they are essential for the working of basic functionalities of the website. We also use third-party cookies that help us analyze and understand how you use this website. These cookies will be stored in your browser only with your consent. You also have the option to opt-out of these cookies. But opting out of some of these cookies may affect your browsing experience.
Necessary
Always Enabled
Necessary cookies are absolutely essential for the website to function properly. These cookies ensure basic functionalities and security features of the website, anonymously.
CookieDurationDescription
cookielawinfo-checkbox-analytics11 monthsThis cookie is set by GDPR Cookie Consent plugin. The cookie is used to store the user consent for the cookies in the category "Analytics".
cookielawinfo-checkbox-functional11 monthsThe cookie is set by GDPR cookie consent to record the user consent for the cookies in the category "Functional".
cookielawinfo-checkbox-necessary11 monthsThis cookie is set by GDPR Cookie Consent plugin. The cookies is used to store the user consent for the cookies in the category "Necessary".
cookielawinfo-checkbox-others11 monthsThis cookie is set by GDPR Cookie Consent plugin. The cookie is used to store the user consent for the cookies in the category "Other.
cookielawinfo-checkbox-performance11 monthsThis cookie is set by GDPR Cookie Consent plugin. The cookie is used to store the user consent for the cookies in the category "Performance".
viewed_cookie_policy11 monthsThe cookie is set by the GDPR Cookie Consent plugin and is used to store whether or not user has consented to the use of cookies. It does not store any personal data.
Functional
Functional cookies help to perform certain functionalities like sharing the content of the website on social media platforms, collect feedbacks, and other third-party features.
Performance
Performance cookies are used to understand and analyze the key performance indexes of the website which helps in delivering a better user experience for the visitors.
Analytics
Analytical cookies are used to understand how visitors interact with the website. These cookies help provide information on metrics the number of visitors, bounce rate, traffic source, etc.
Advertisement
Advertisement cookies are used to provide visitors with relevant ads and marketing campaigns. These cookies track visitors across websites and collect information to provide customized ads.
Others
Other uncategorized cookies are those that are being analyzed and have not been classified into a category as yet.
Save & Accept
 

Loading Comments...
 

    %d

      Rate This Recipe

      Your vote:


      A rating is required
      A name is required
      An email is required